MMXLC X4/X5/X6 Stage Sprites Extractor development highlights (Mega Man Legacy Collection)
Quick link: megaman-x-legacy-collection-x4-x5-x6-sprite-extractor
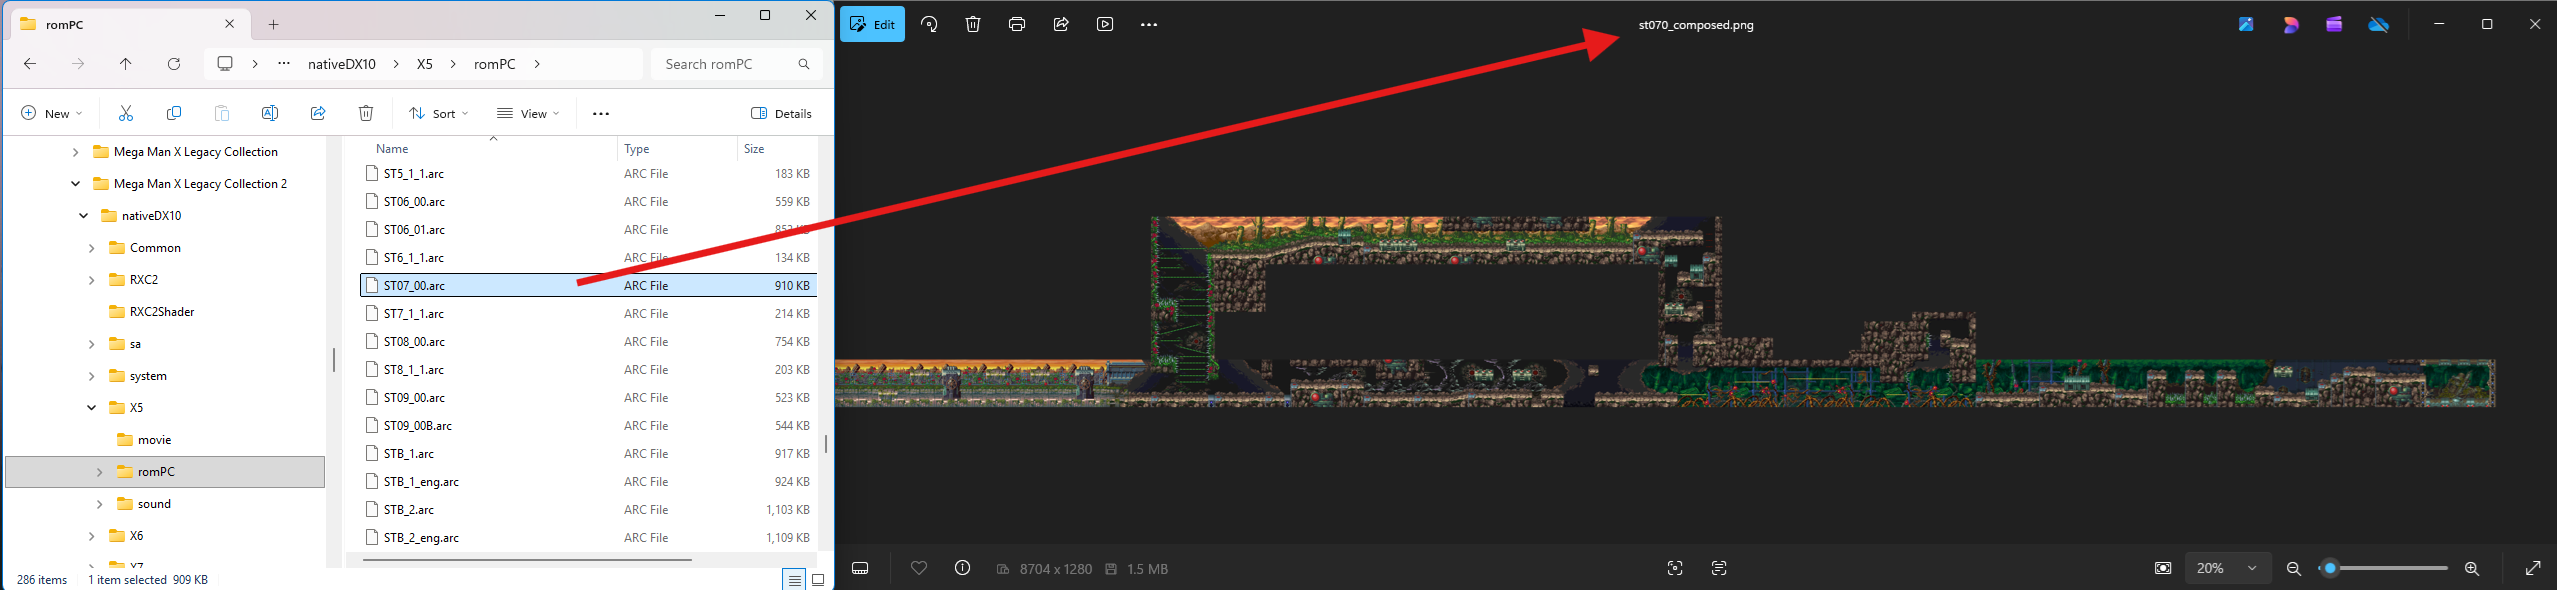
The project started out on a whim on 23rd May 2026 thinking it’d only take a few days but it became much more challenging than expected. I thought ripping images out from the Mega Man X4/X5/X6 Legacy Collection releases would be easy given the process is already known for PSX versions, but as I discovered over the next ~9 weeks Capcom changed more than just the packaging.
Before starting this, I did actually ask around the romhacking forums and MMX Viral Nightmare Discord about how they were able to rip assets out. The answer was basically “dump PSX emulator VRAM” as it was the easiest and most consistent, then manually stitching things together post-extraction.
It was taunting me. Assets sitting right there on my PC but nobody had an easy way to access them. Challenge accepted.
(Skip to the end if you just want to see a recap video for each game)
 |
 |
RMX Challenge 1; Reading recognisable pixels
23-25th May
I was familiar with extracting from Capcom’s ARC archives in the past with clunky CLI tools for the PSX releases, but newer tools like Watto Game Extractor have made things much easier.
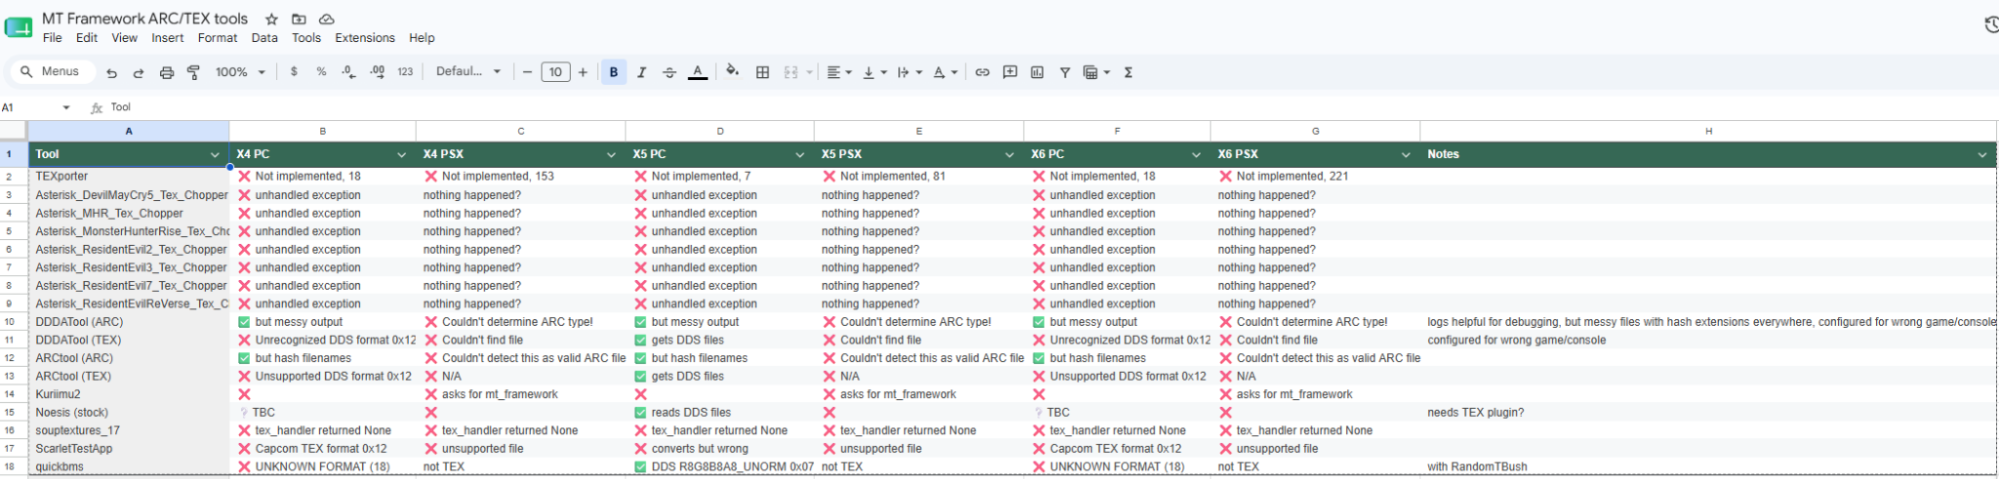
It’s been a long time since then so I went and tested a whole suite of new PSX/PC ARC extractors and TEX converters for Capcom’s MT Framework, but was disappointed to find that the majority did not support the specific formats used by MMX LC games. The ones that did manage to extract something only spat out blank DDS files.
(See MT Framework ARC/TEX tools)
 |
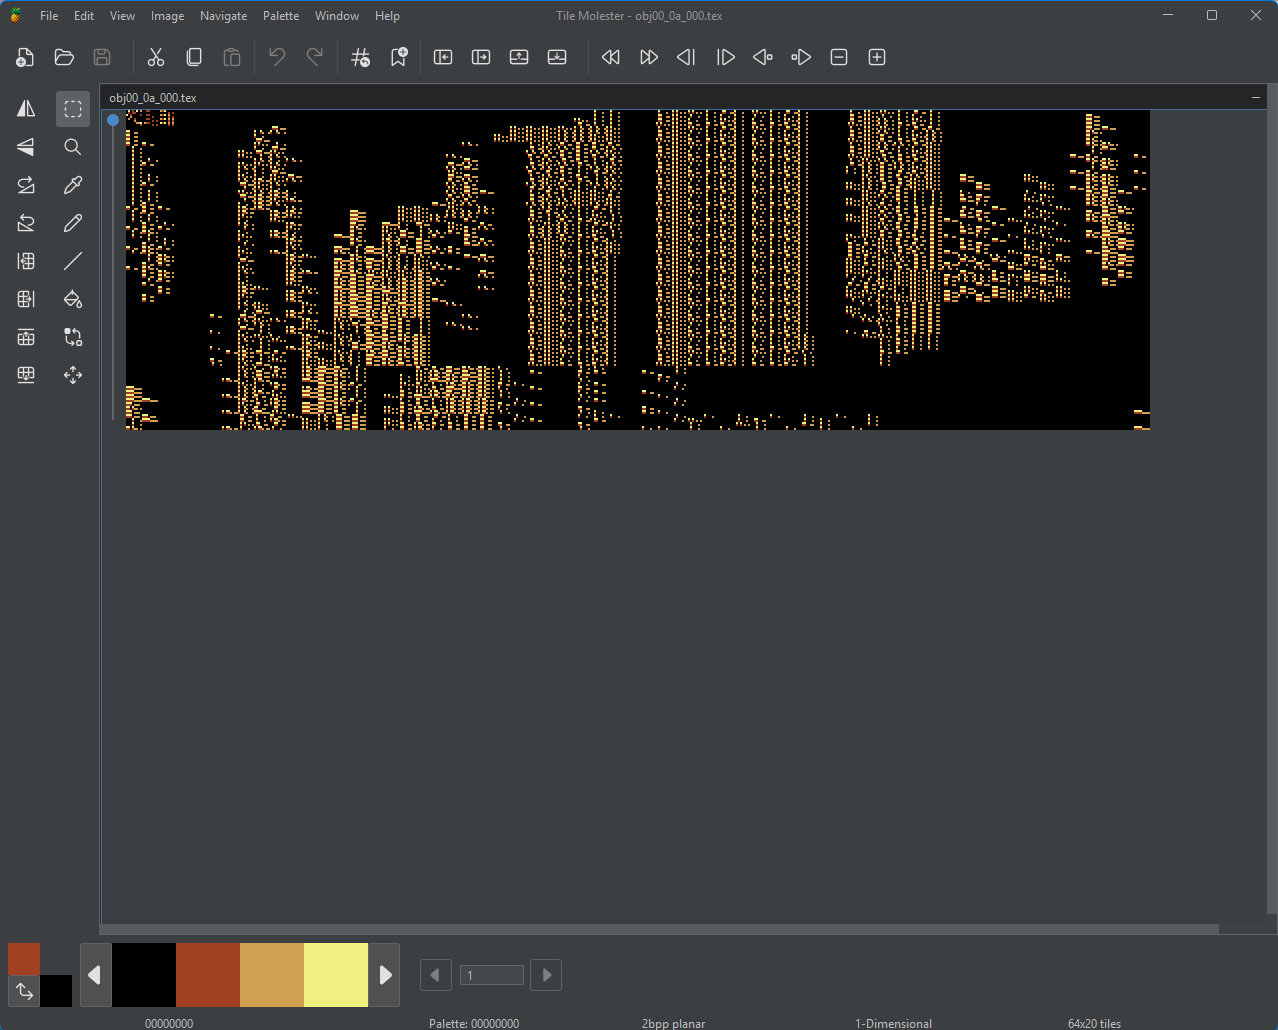
After looking up guides on romhacking.net forums, I used TileMolester (that name… 🤣) on a few TEX files to try and figure out the data encoding used for the format. To my surprise, the extracted files were all in greyscale! Searching a bit online showed results pointing back to the DDS format!
(TileMolester garbled vs decoded greyscale)
 Default when opened Default when opened | 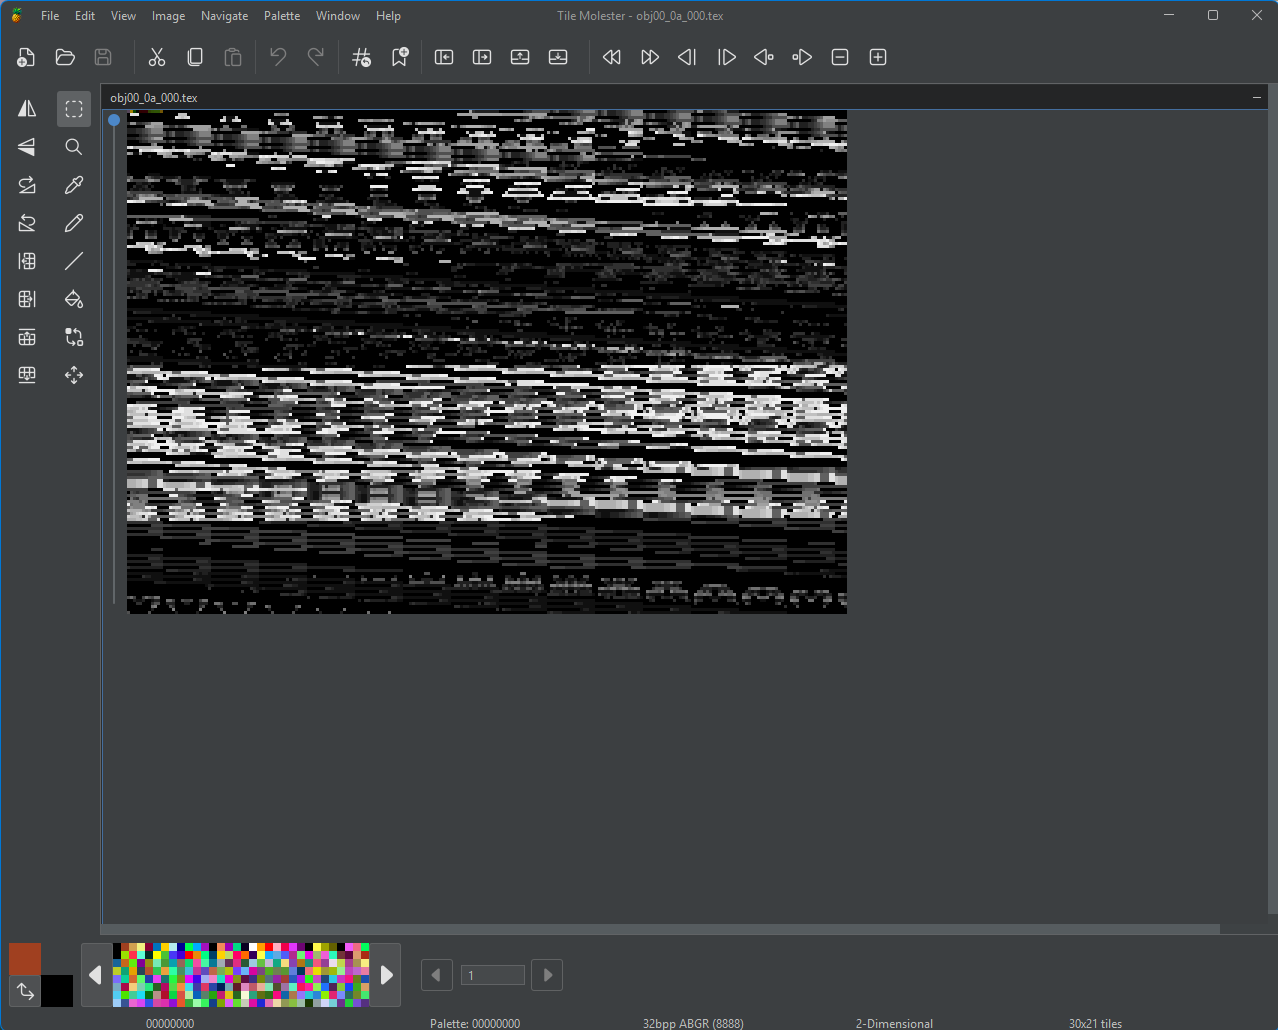 View mode: 2-dimensional, Codec: 32bpp ABGR View mode: 2-dimensional, Codec: 32bpp ABGR | 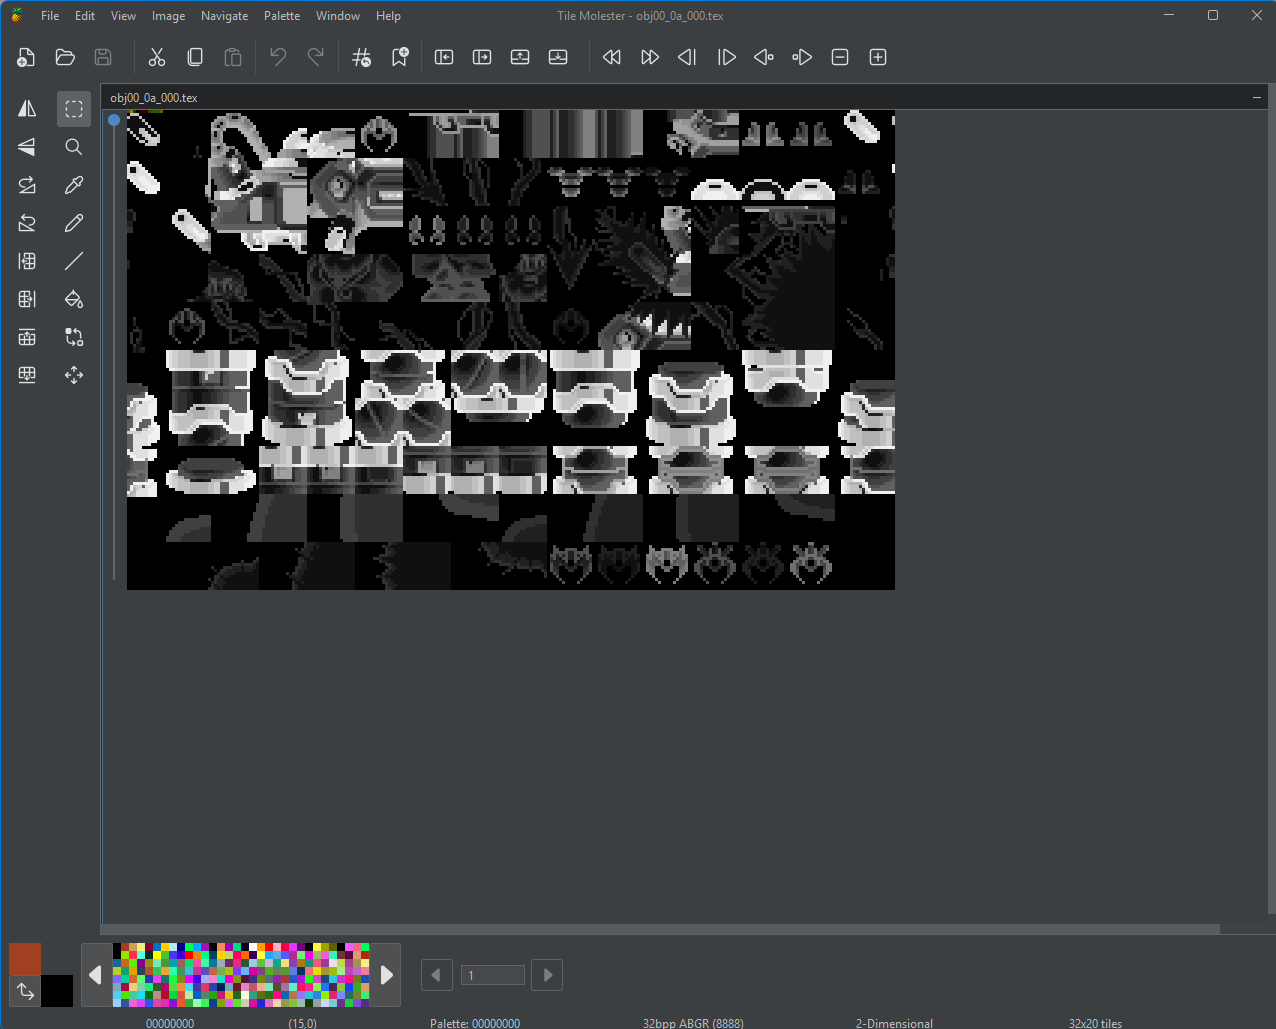 Gotta get the perfect canvas width, multiples of 2 Gotta get the perfect canvas width, multiples of 2 |
So it seems our friends at Capcom converted existing graphic files to a different texture format within their MT Framework engine, format 0x07 which correlates to the 32 bits/pixel DDS format (as documented by RandomTBush’s RTB-QuickBMS-Scripts CapcomMTFrameworkSwitch_TEX.bms), which I assumed would be RGBA. Good news for me, a simple format after stripping out MT Framework headers means less work.
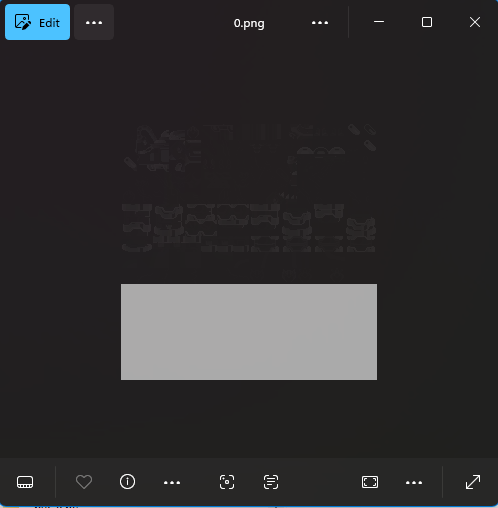
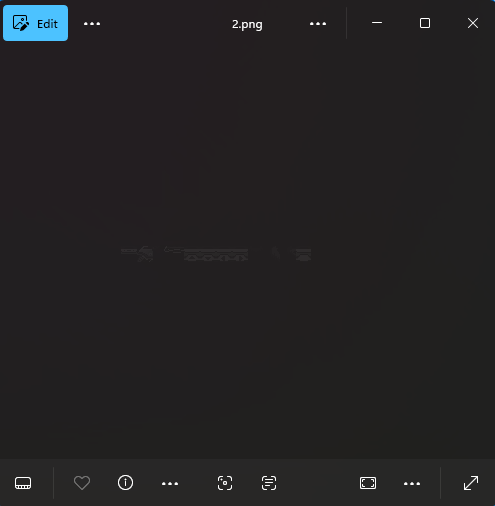
But why did TileMolester show images while coming out “blank” when exported? Converting a few more files showed the data was actually there, just at really low opacity. At least now we’ve got something recognisable to work with, even if its missing colour.
(DDS as PNG)
 |  |
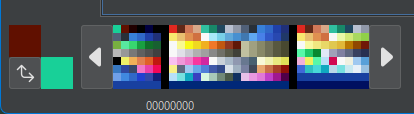
The next stop was to investigate the COL files, which I assumed contained the palettes required to render these textures. The TileMolester coders must be wizards, because when I randomly opened up a specific player palette/COL file it immediately showed recognisable colours (player-X colours). BGR555 was the palette format.
 |
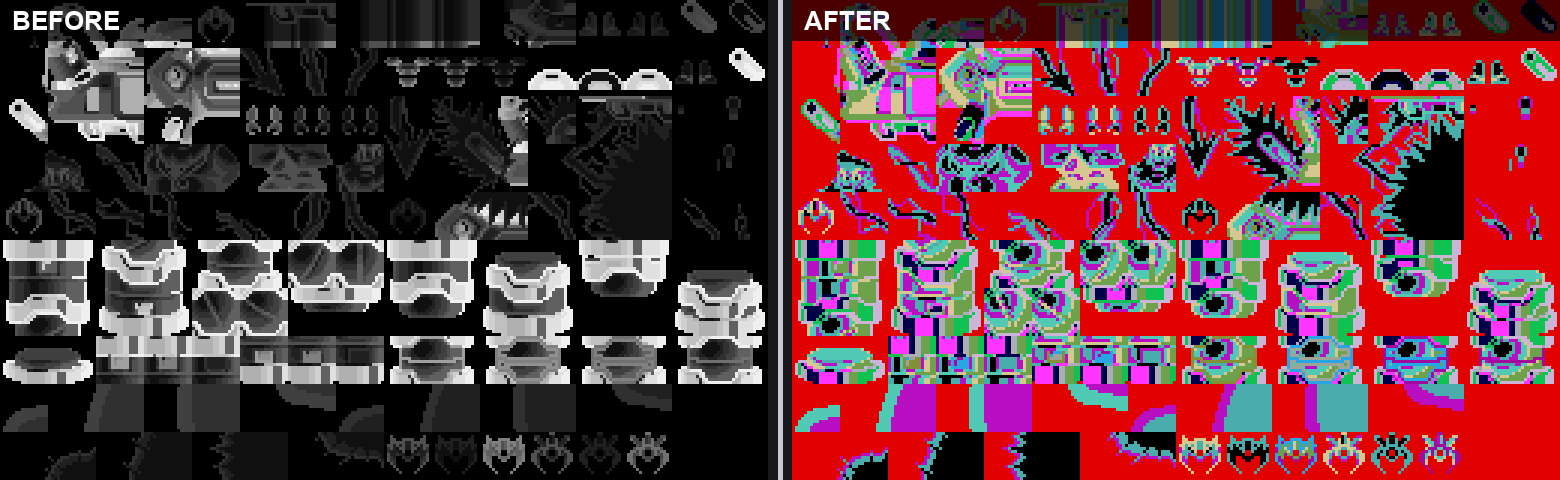
I couldn’t see a correlation between the data, so I just manually map the texture image RGB colours to indexes in the palette and hoped for the best. The result is this colourful mess.
 |
RMX Challenge 2; Cracking the CLUT
26-29 May
The next logical step was to figure out how to correctly apply palette colours to images.
Using X5 intro stage screenshots from a PSX emulator Duckstation with all post-rendering options off, I manually examined and mapped a dozen specific pixels within recognisable patterns matching a TEX file. Since the TEX file image was greyscale (meaning RGB values were equal), I had 3 pixel variables to work with; TEX_RGB, TEX_ALPHA, and the expected SCREENSHOT_RGB.
When splitting the image TEX_RGB and TEX_ALPHA out into different CSV spreadsheets, I viewed them zoomed out to visualise the relevant pixel locations. This gave me exact and consistent coordinates to work with. Tell me I’m not going mad, you can totally see it, right?
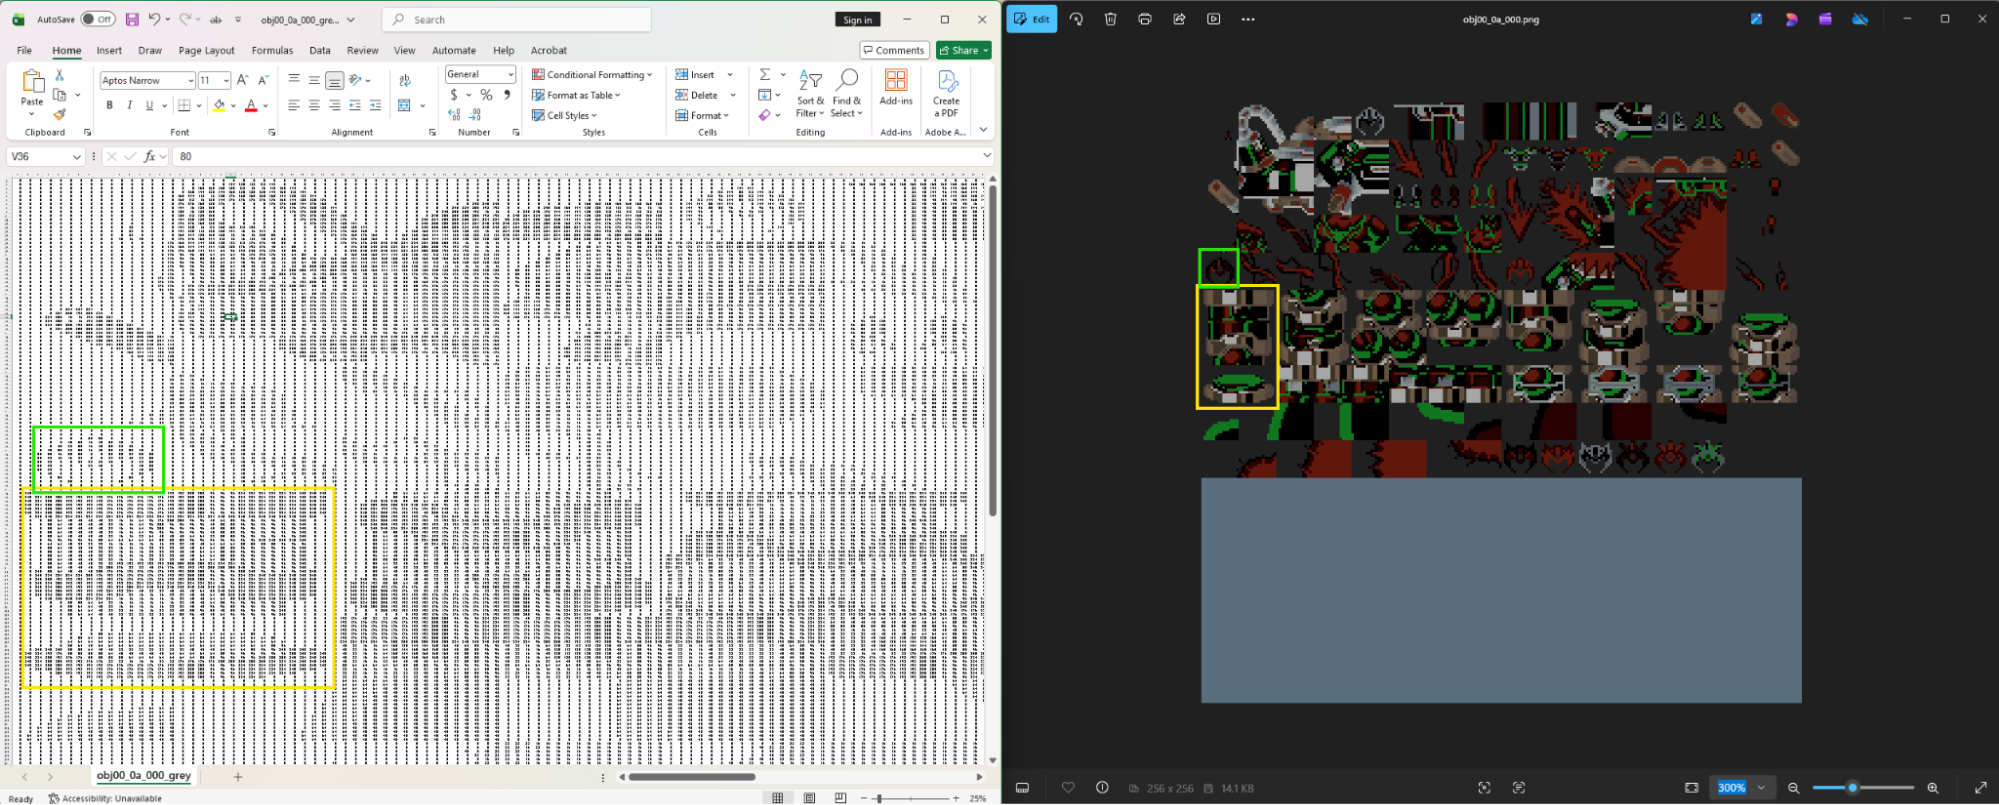
Annoyingly, the RGB colours from the screenshot and palette didn’t quite match exactly so I applied a slightly lenient matching with a buffer of about 3-5 off.
Trigger warning: I used AI to help process data during this project and to explain data structures. I already know how to code in Python and generate a GUI, but consider it a chore that I’m not really interested in doing myself. I wouldn’t have had the time to put into this project without it. If you have a problem with this, please stop reading. This is not the place to discuss morality of AI.
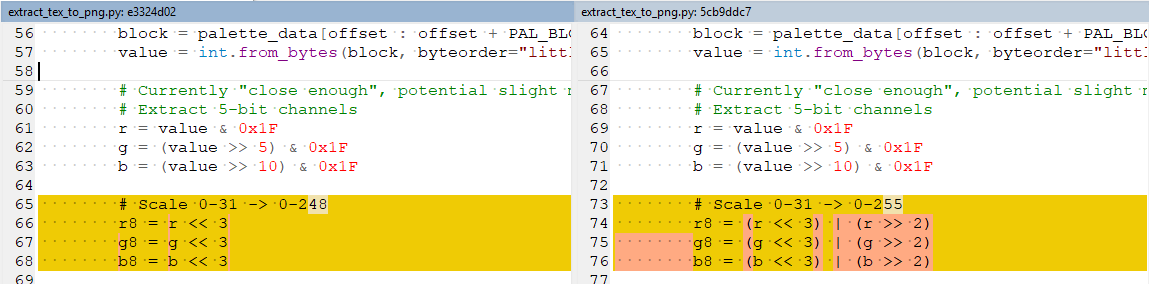
I’m gonna be upfront about it right now, I’m terrible with bit-shifting calculations. I can read and understand something is happening, but my brain just doesn’t math in 1s and 0s. So when I asked AI to generate a snippet converting BGR555 to RGB, there was little chance I could have spotted a bug which led to a lossy conversion of 0-248 instead of 0-255. The fix below resolved the RGB discrepancies when rendering slightly dull colours.
Some research into PSX era APIs revealed a CLUT (Colour Look-Up Table) was a palette stored as an array of 16 colours, with each colour/swatch in the format of BGR555 (5 bytes each for blue, green, red). The COL file stored all the relevant palettes/CLUTs in one giant array, so we have to chunk it into rows of 16 while reading it in.
This proved directly mapping RGB to palette index wasn’t a viable strategy. Curiously, the Alpha channel of the image seemed to only range from 0-15 so it seemed like a good candidate.
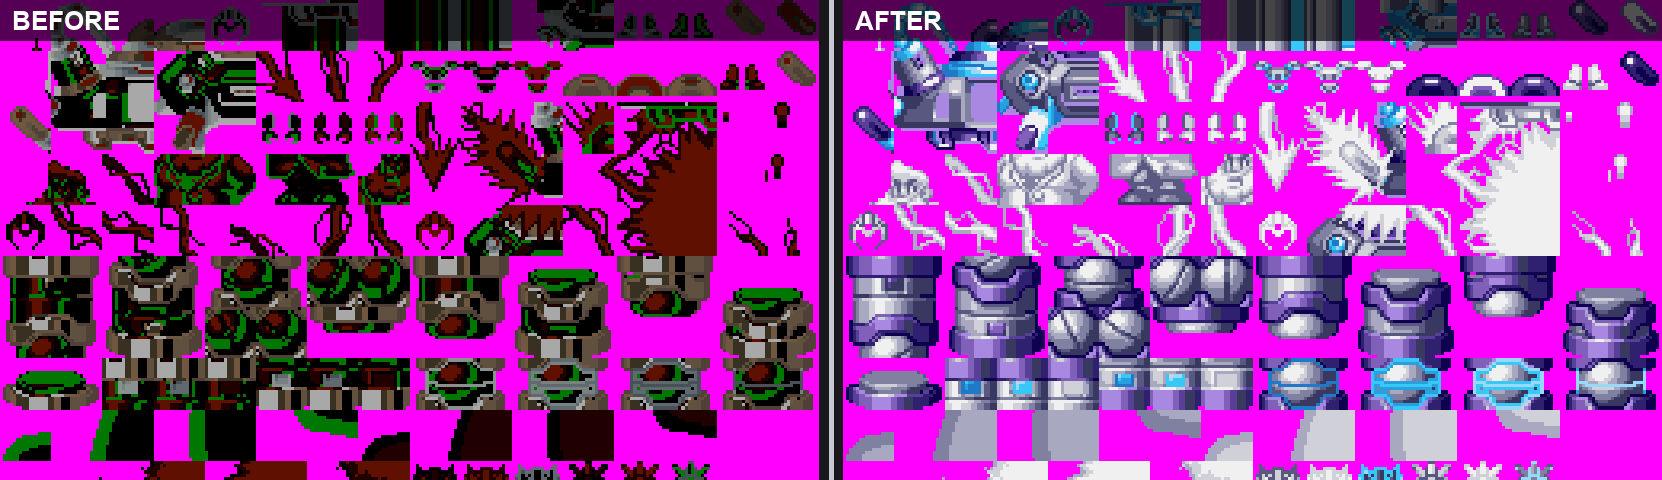
I quickly put together a script which rendered each 16-colour CLUT row in the COL file labelled by row index, visually inspected the colours and brute forced a limited selection of options to see what comes out. Worked like a charm!
(Example of brute-forced coloured images)
 Experimenting Experimenting |  Brute-force each CLUT Brute-force each CLUT |  Stumbled across right one Stumbled across right one |
Another thing spotted was that it seemed RGB 0,0,0 (black) was to be skipped, leading to a transparency effect. Simple enough.
Being able to render the whole TEX image with a given CLUT gets us a little bit closer to what we want.
 |
RMX Challenge 3; Building a tool to find palettes
30-31 May
By now I was tired of manually rendering TEX images against CLUT indexes hundreds of times.
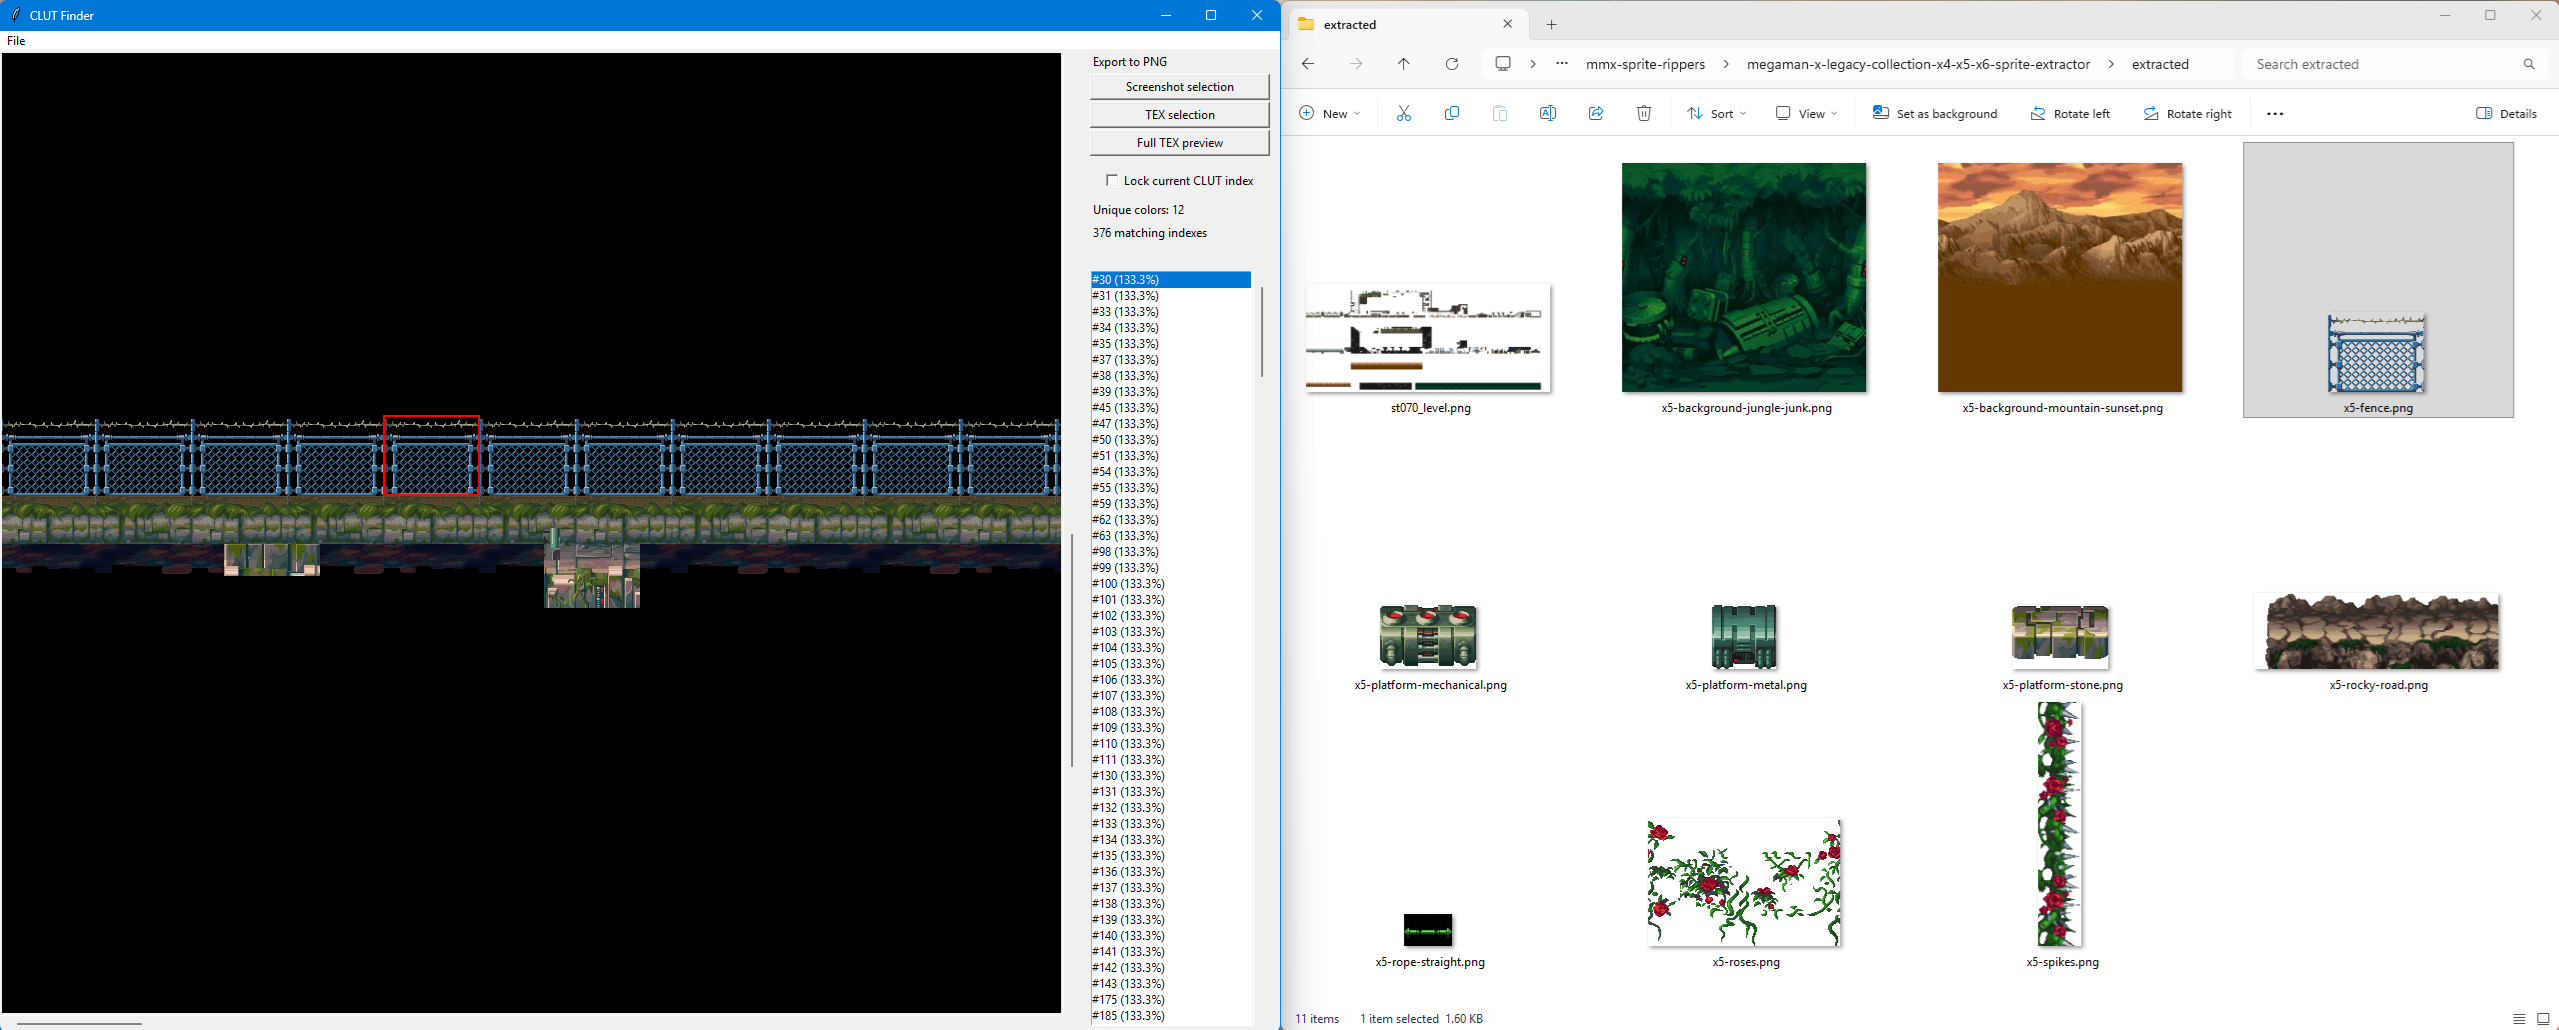
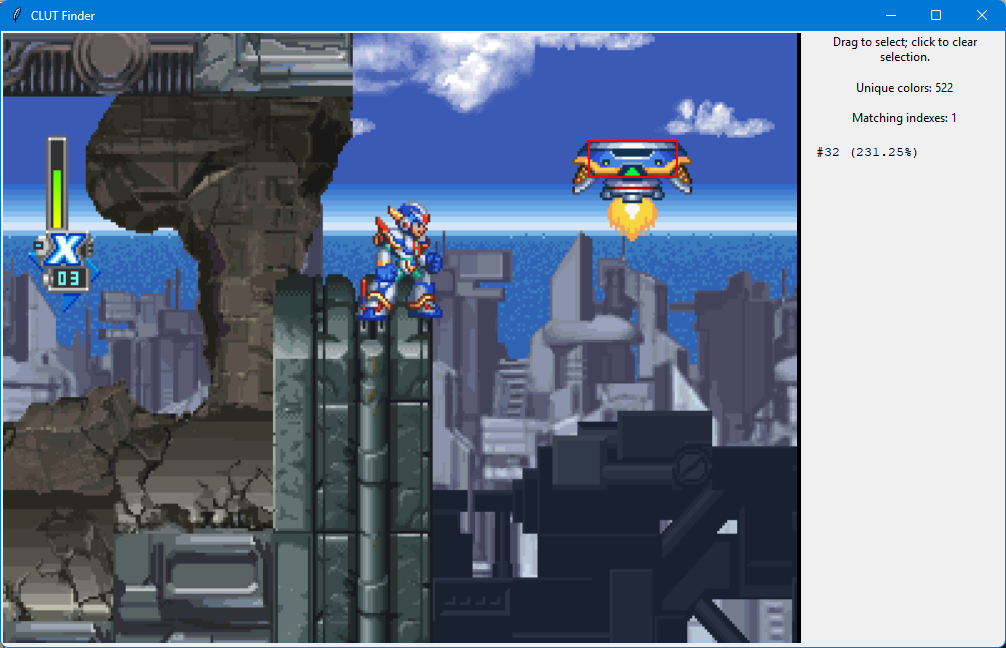
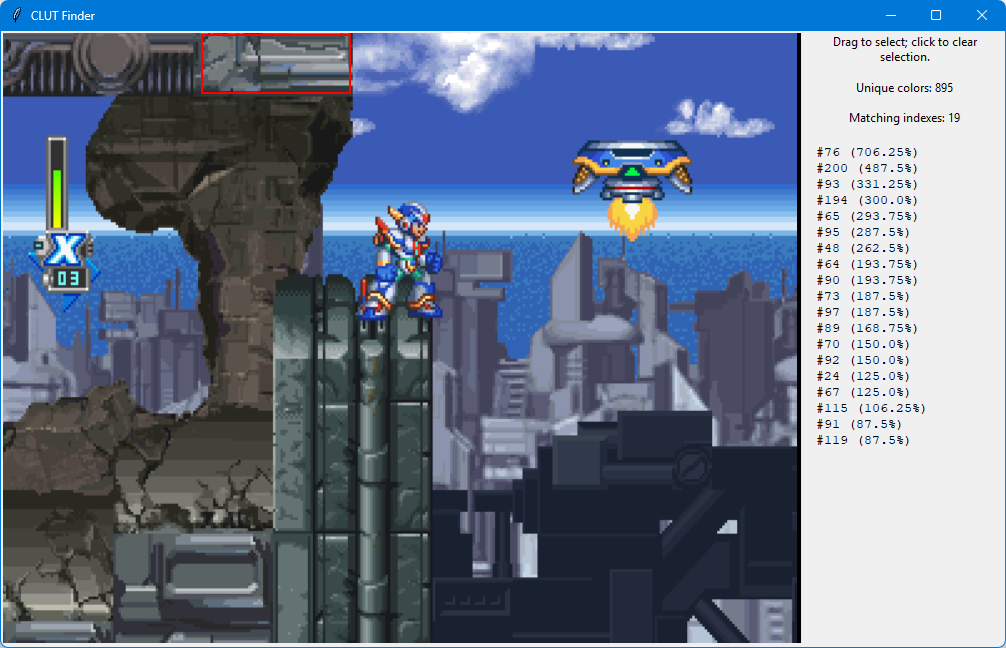
Quickly vibe coded the UX for a tool called “Clut Finder” which let me
- load up an in-game screenshot
- highlight area of interest
- list the best matching CLUT palettes for the selected area (I still wrote the matching algorithm for this myself)
- render a preview of a loaded TEX file with the best matching CLUT palette
- responsive UI when window was maximised or resized
This tool proved to be very helpful throughout the project as it helped simplify the debugging process.
Other features added later were
- Ordered matching CLUTs by percentage
- Print out tile/pixel coordinates of highlighted area
- Ability to extract highlighted areas from screenshot/TEX as PNG
Early UX: MegaMan X Legacy Collection X5 sprite extractor (work in progress)
 |  |
RMX Challenge 4; 8bpp sprites and trees
31st May - 1st Jun
As exciting as all these developments have been over the past week I realised that I wasn’t making much progress to my actual goal, creating a script which extracts stage sprites/tilemaps. So far all I had working was rendering parts of entity sprites (characters, enemies, interactive objects, etc) which used TEX format_code = 0x07 (32 bits/pixel)
The actual textures for level images were stored as format_code = 0x12 which I wasn’t even able to load yet. This part took a while to crack because I had trouble finding any relevant documentation online.
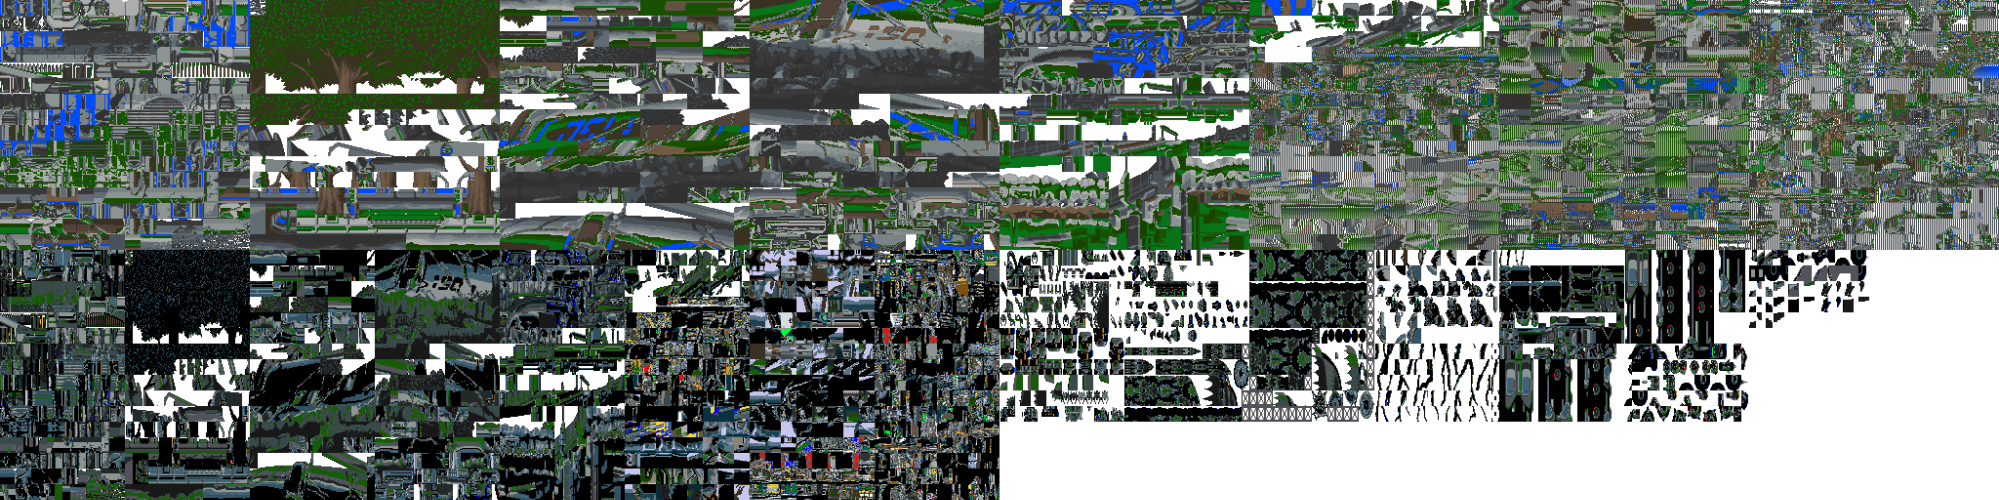
Using TileMolester eventually showed me recognisable “tree” data with different encoding settings. A scan of the output data in CSV spreadsheet revealed that entities/characters used RGBA data (32bpp), while stage data was just “A” (8bpp) and easily confirmable in TileMolester. The 8bpp 0x12 format threw me off because I read somewhere the original PSX version was 4bpp, so I assumed it would have been the same for the LC version.
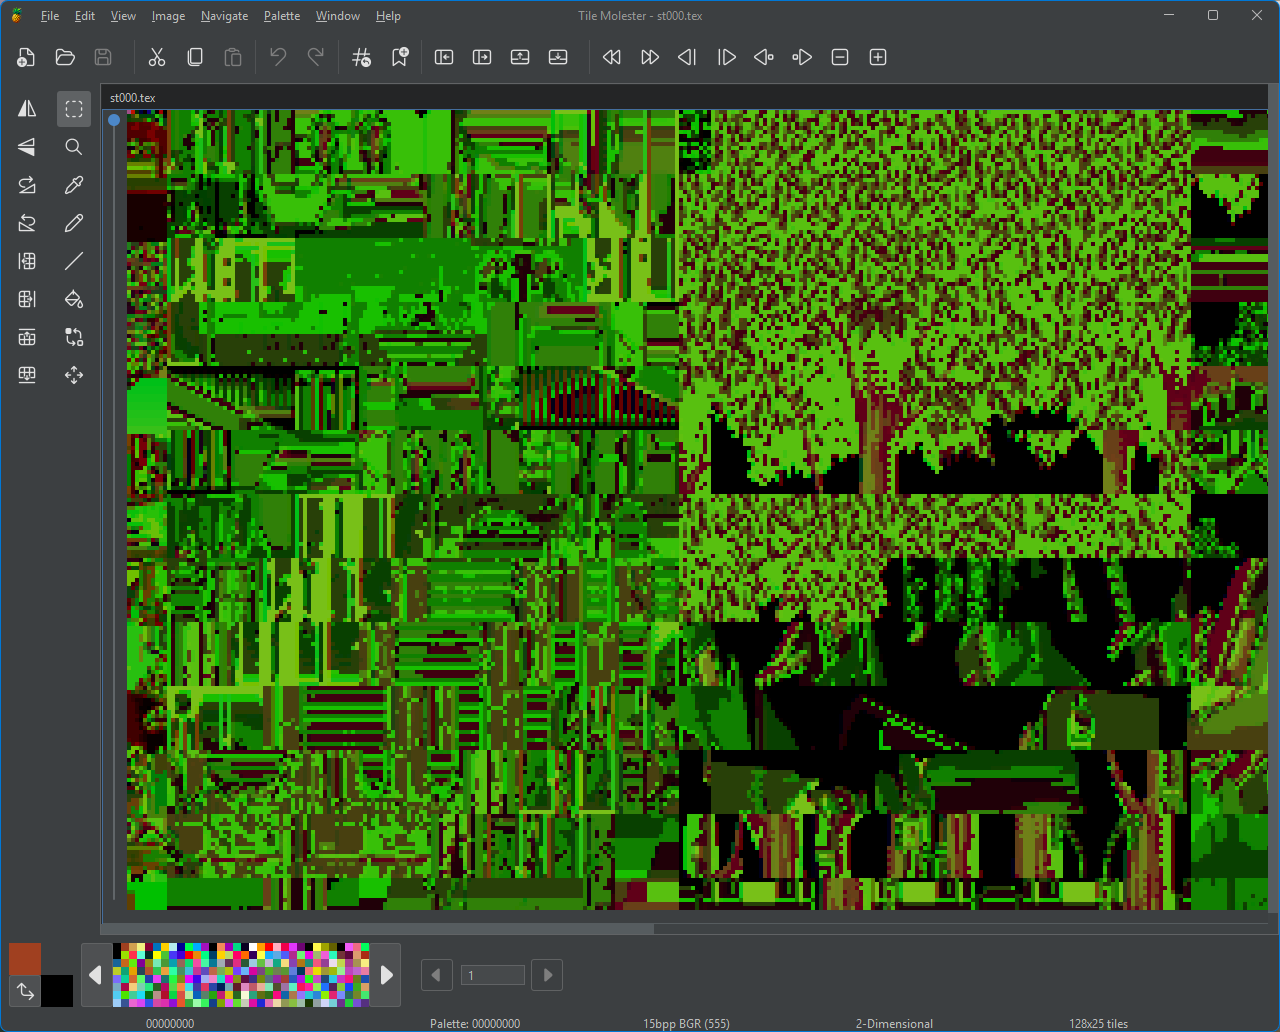 15bpp BGR555 15bpp BGR555 | 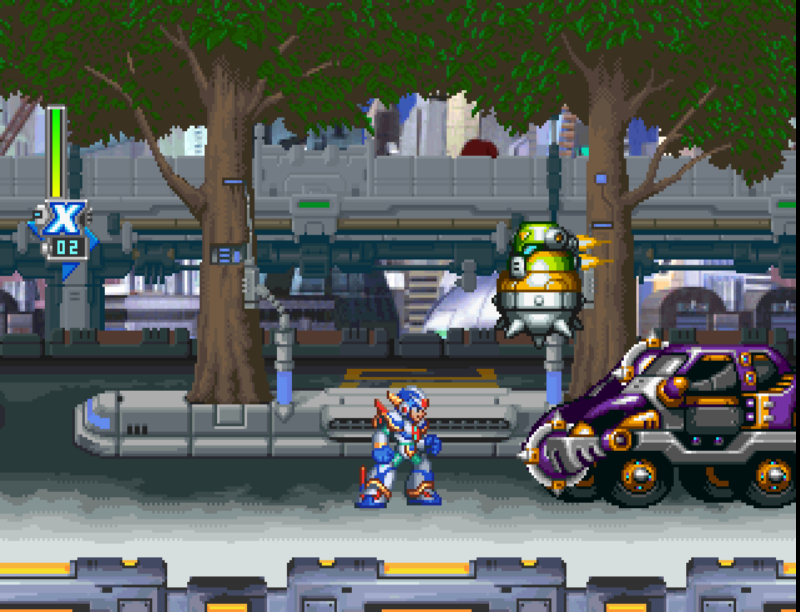 In-game screenshot of those trees In-game screenshot of those trees |
Let’s just say I’ve never been so excited to see trees before. Another subtle Legacy Collection puzzle piece down!
 |
RMX Challenge 5; From single tiles to whole stages
3-11th Jun
Now for the really hard part… figuring out how the game stitches a stage map together from tiles. From analysing the TehemanX4 Editor rendering pipeline, I learned what the OCL and OMP headers should look like and rendered it out.
Interesting trivia; the OCL entry colour mapping for stage tiles needed to be offset by 64 in order to skip the player-character specific palettes. This helped determine which tilemaps to load, avoiding the issue which Acediez ran into with his PSX stage renders
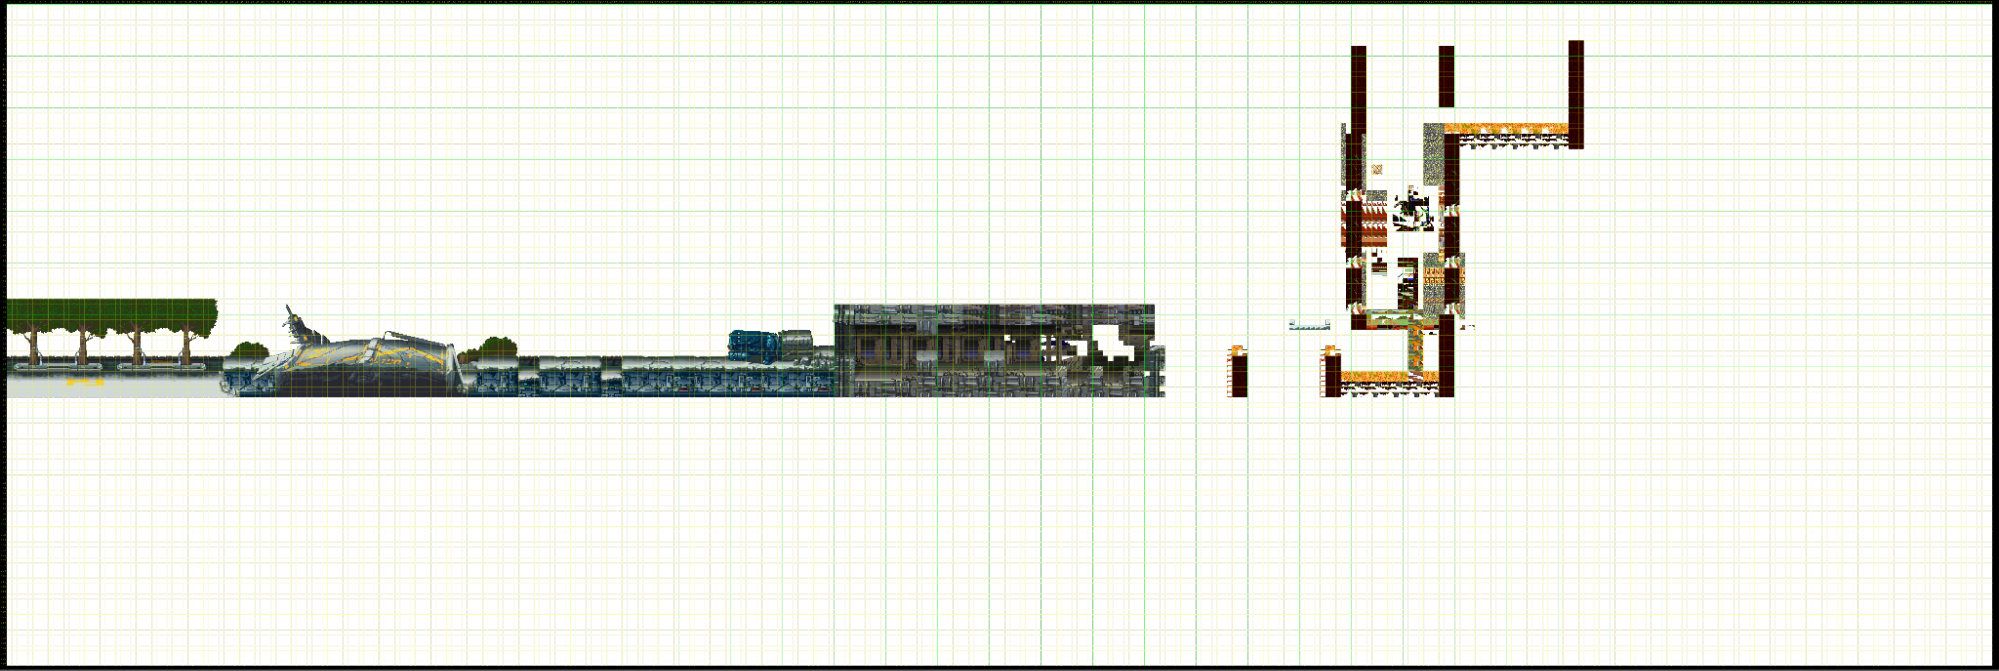 | 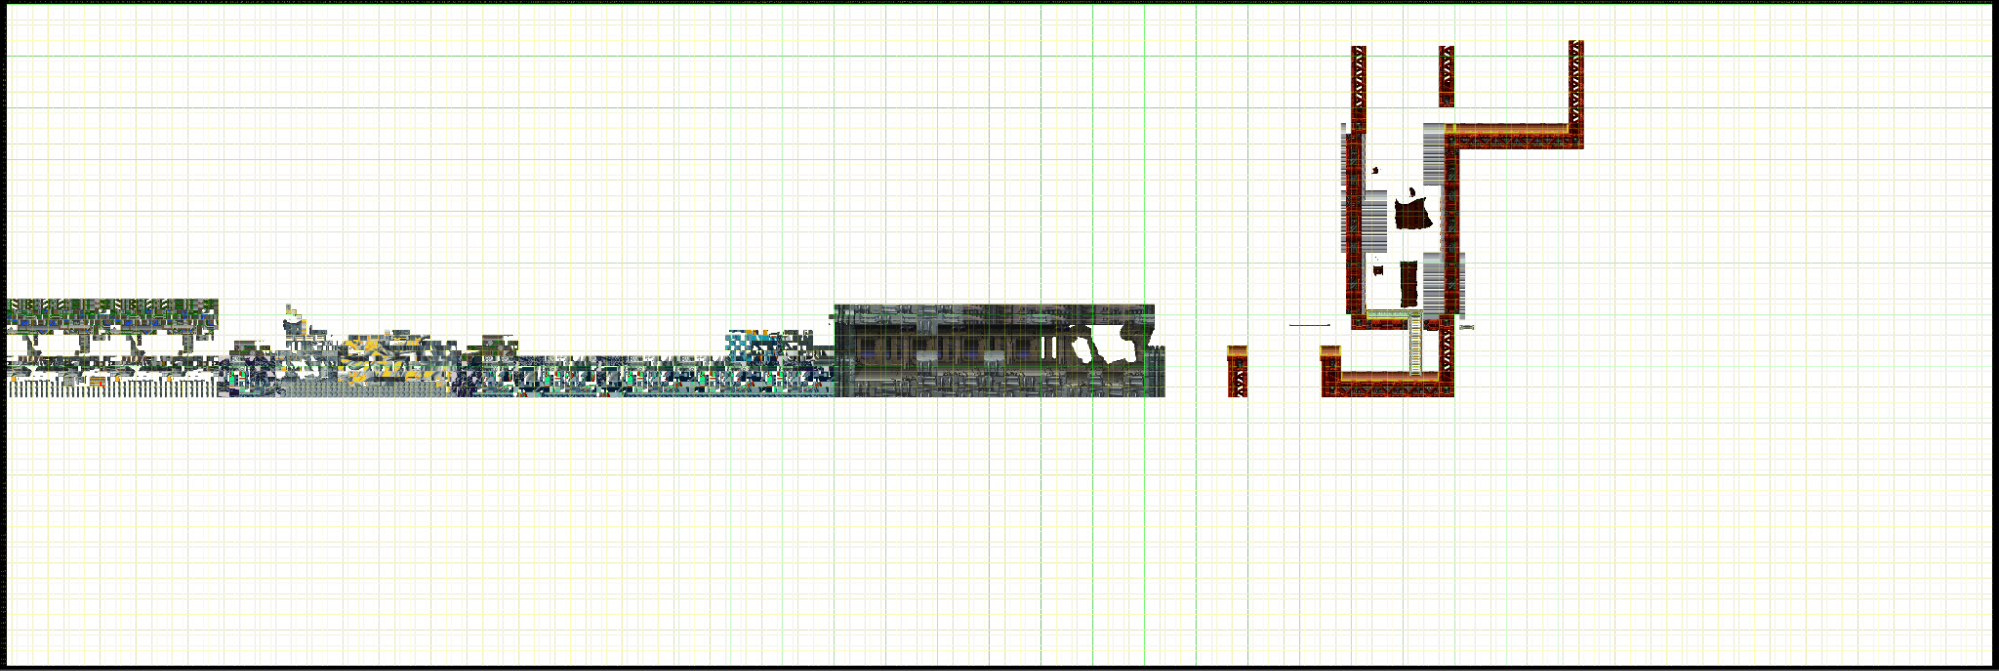 |
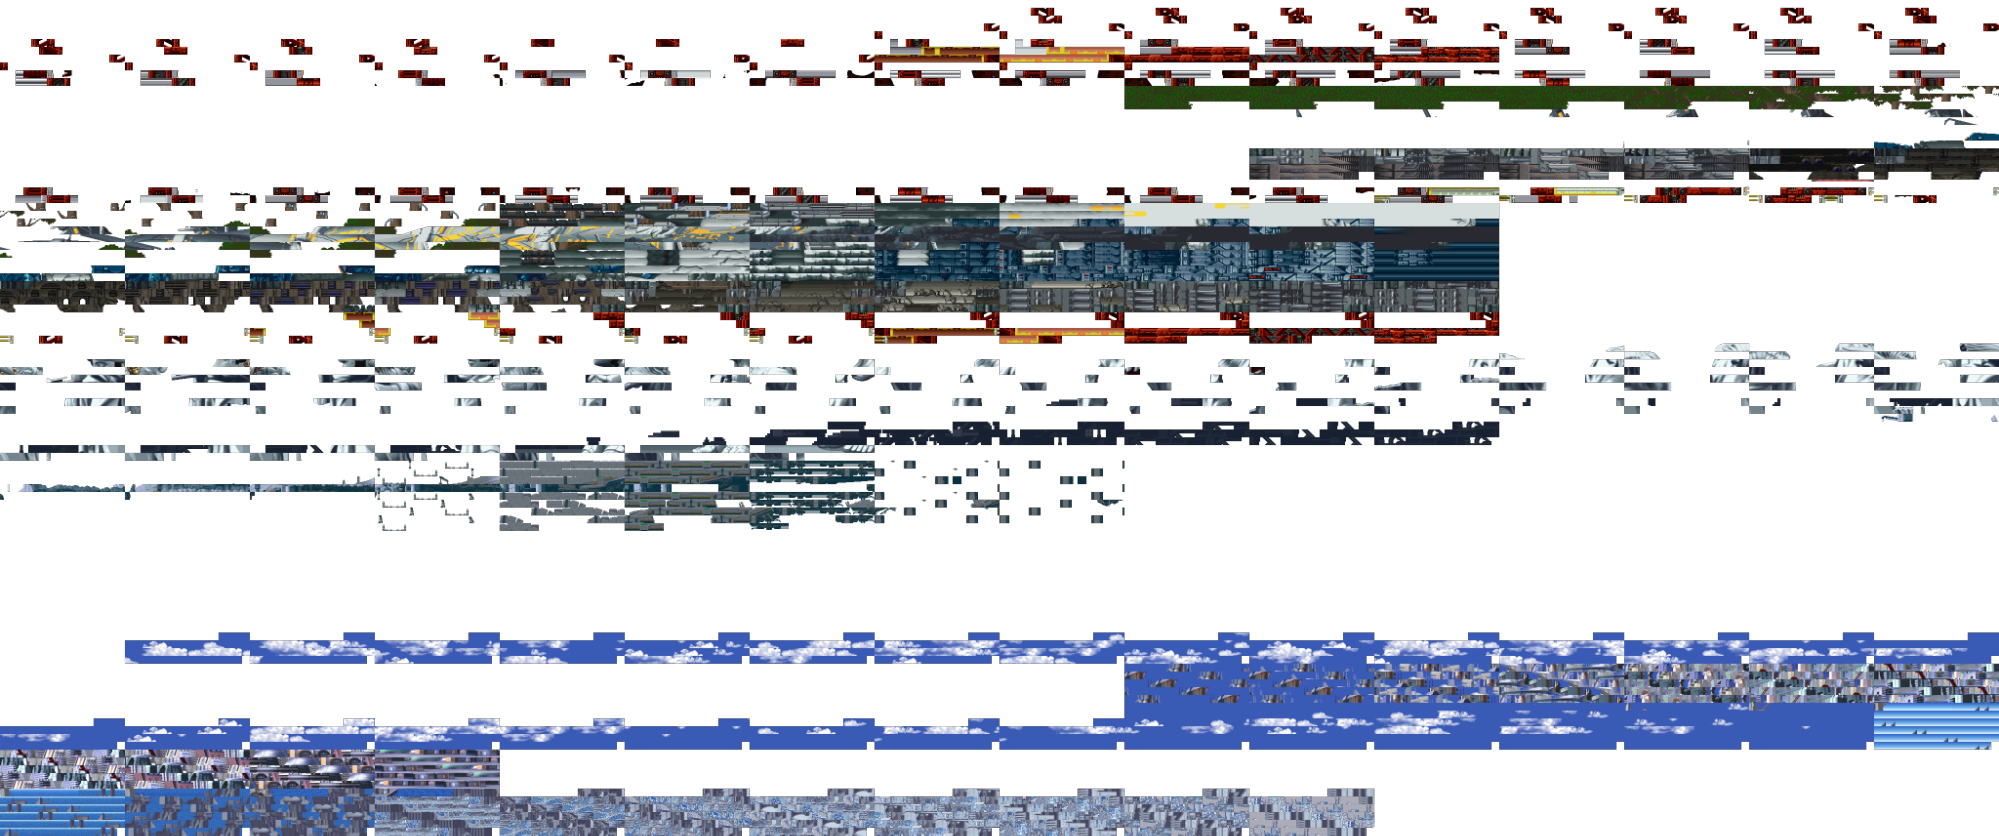
Hoping for a full stage laid out in PNG, I was sorely disappointed when greeted with stage data formatted as a bunch of stripes. Whyyyyyyyyy!?
 |
Looking deeper into the TehemanX4 code shows stage layout tables at specific offsets of the PSX executable file. The idea of that sounds kinda crazy to me, but if it works then I can’t fault it.
Without much experience with hex editing, I had no idea where to begin to find offsets within the MMX LC executable files let alone if they still encoded it the same way at all.
So I fell back to doing what I do best, manual labour. Wrote up script draw_grid.py to draw overlays on TEX PNGs and screenshots so I could manually map the in-game tile positions to tilemap positions and expected CLUT index it should be rendered with. I targeted the X5 intro stage using an existing dump from Acediez.
It was tedious, but worth it. Plugging the mapping data into AI, I got it to generate steps for me to follow in order to learn what to do, investigate and analyse in order to get the offsets I needed. I suspect it used learnings from the TehemanX4 Editor rendering code to determine what the layout data would look like.
What I ended up doing was
- Gather tile mappings within a few specific “screens” (a 16x16 tile block; 256x256 pixels in size). For example, if you start on a stage on screen 0 then walk far enough to one side until all the tiles from screen 0 are no longer visible, you’d have reached the next screen.
- These screens needed to be right next to each other. Approximately 4 of them or more is better.
- I was given a certain HEX sequence to search for; with each value being a
screen_idfor a given tile to tilemap mapping I found earlier. - You know you’ve stumbled into the layout table region when you see an area with lots of zeros.
- Determine what position your sequence is at within the layout table data (easy enough to count screens from layout dumps). Once that is known, read the current offset address for the sequence and subtract away the position to get the start of the array. The address for the start is what you need for the stage layout table.
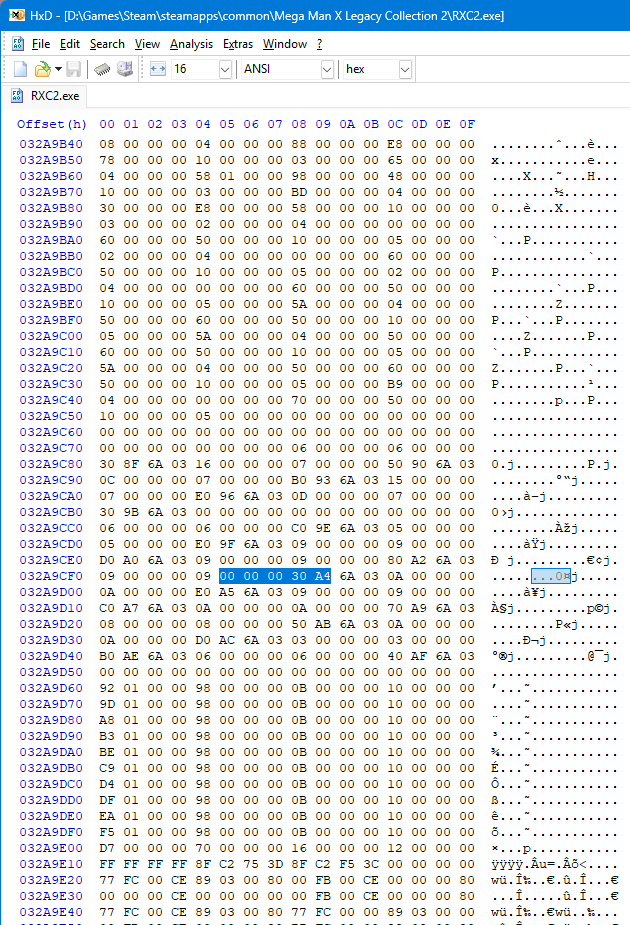
I threw that offset into the experimental script and… surprisingly got something similar! Some things were still horribly broken, but it’s definitely a step in the right direction!
But how many bytes to read? What’s the length of this array? It’s still all guess work…
RMX Challenge 6; Finding the maps hidden inside the .EXE
5-20th Jun
(I know timelines are starting to overlap, but only because I was interested in fixing different things at the same time. Keeping the sections separated by theme makes for easier reading. And wow where did those 2 weeks go?)
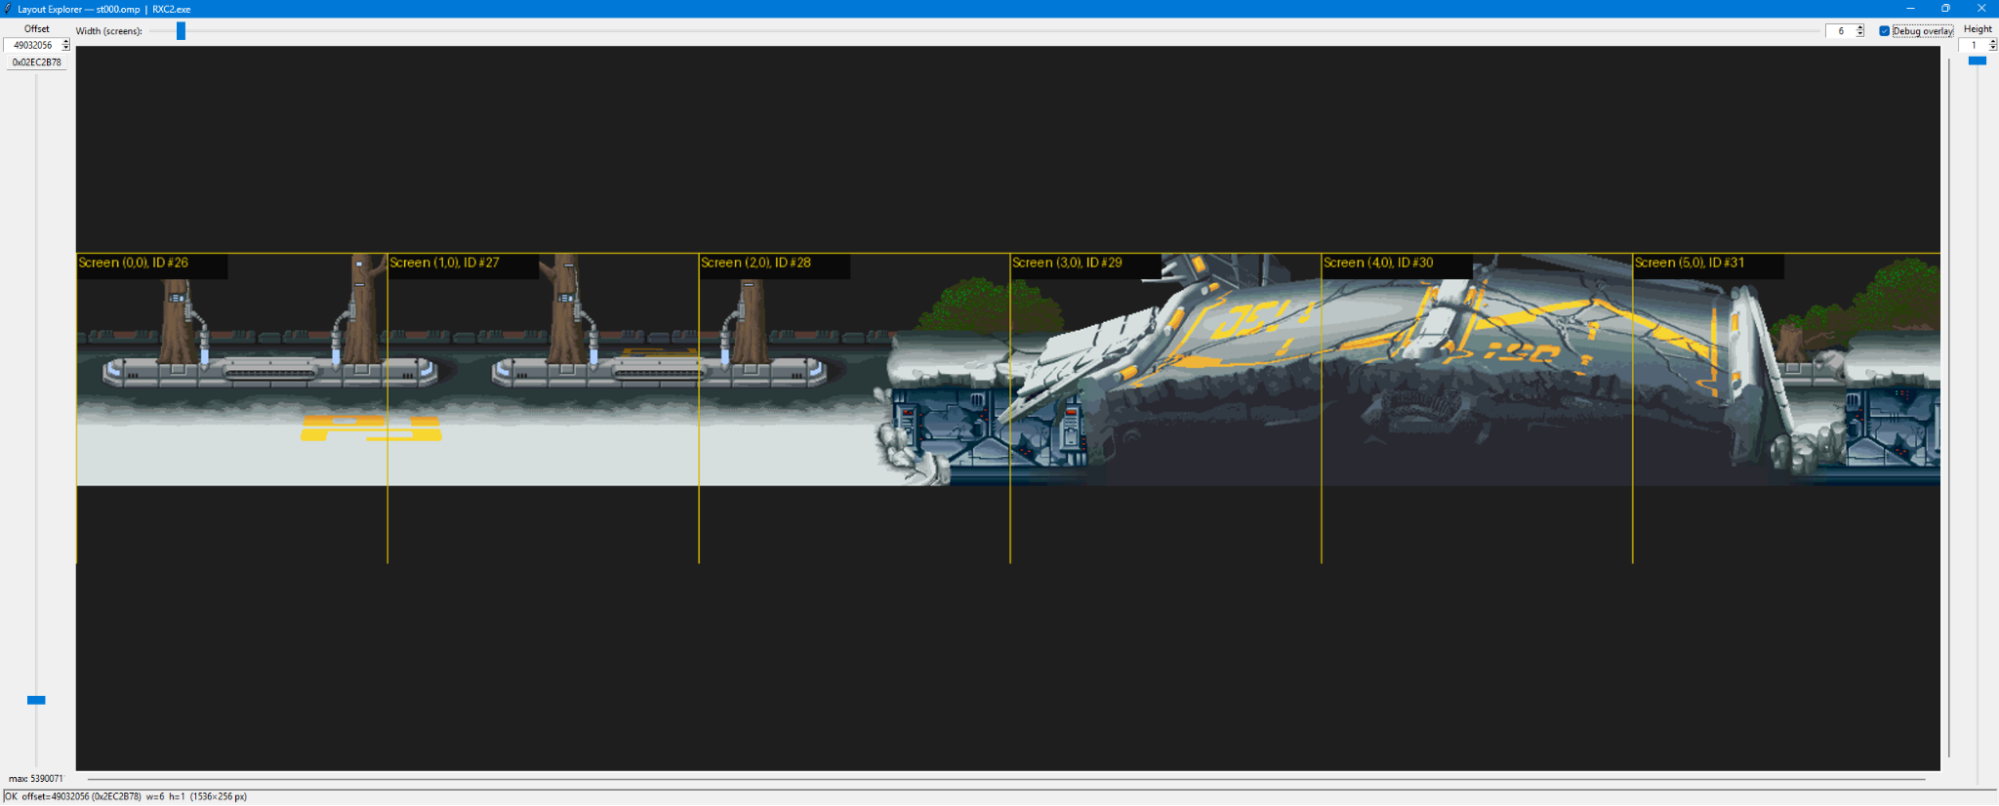
Manually updating width/heights and re-rendering via command line was an absolute chore, so I put AI to work again and scaffolded up a quick “layout explorer” GUI tool called explore_omp.py to “browse” through the EXE by passing it an OMP file (poorly named script now that I think about it, but it’s ingrained in muscle memory now)
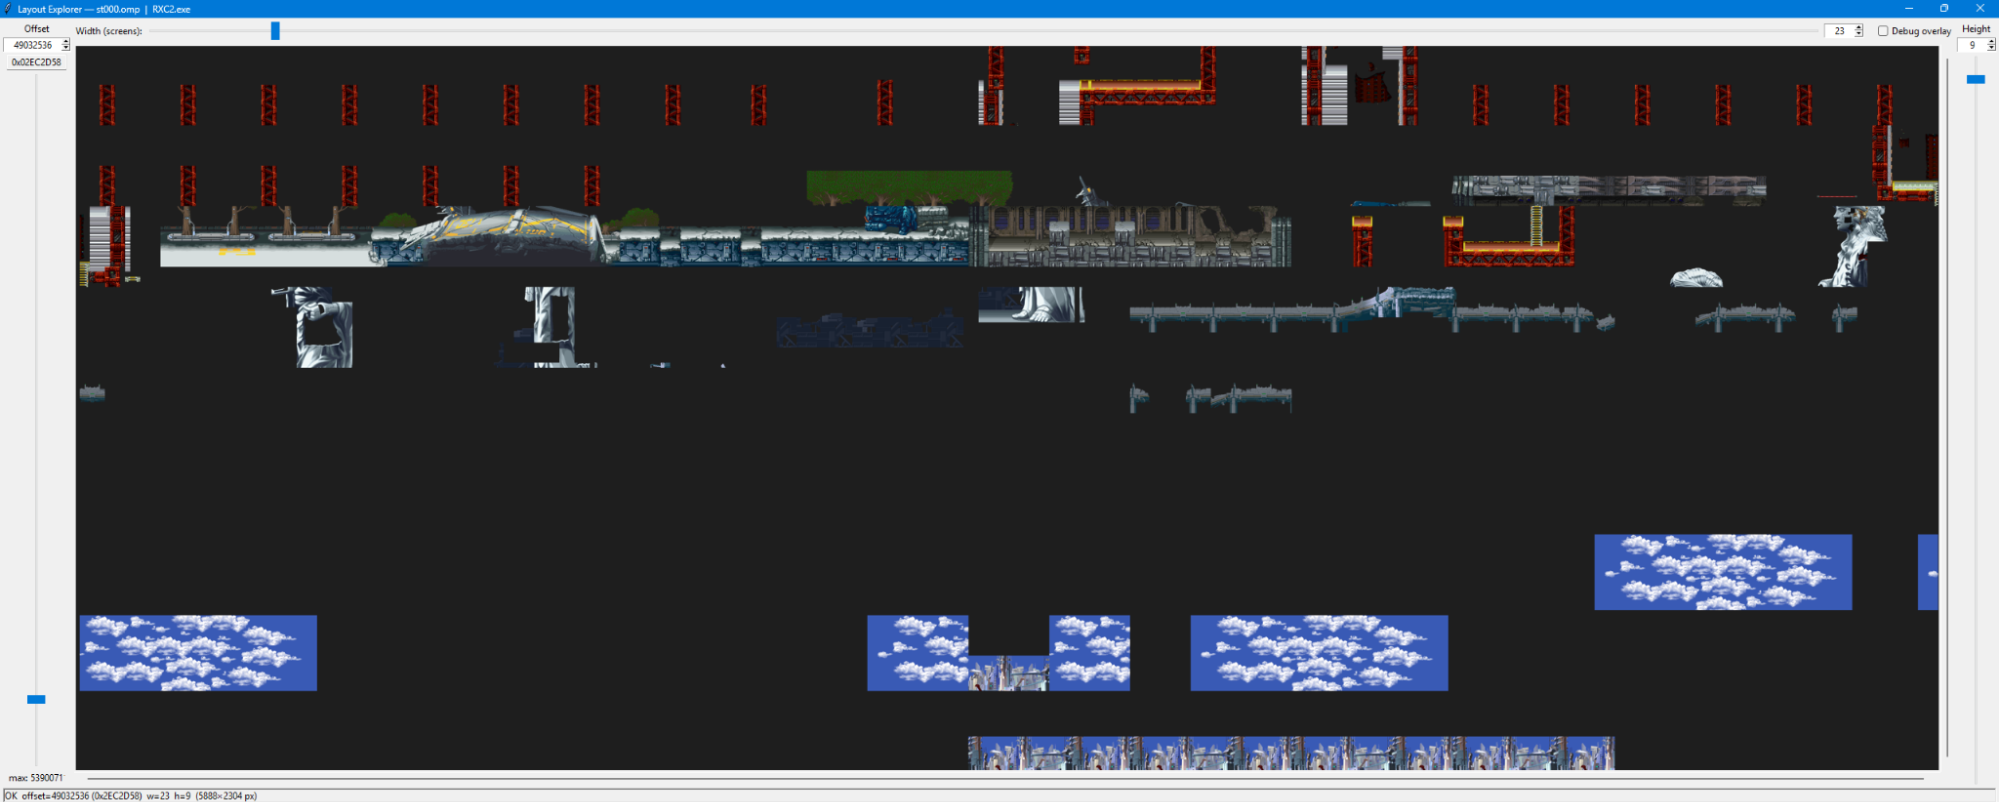
Fire it up, scroll through the executable with a preview of what the OMP would look like given
- chosen width
- chosen height
- current offset
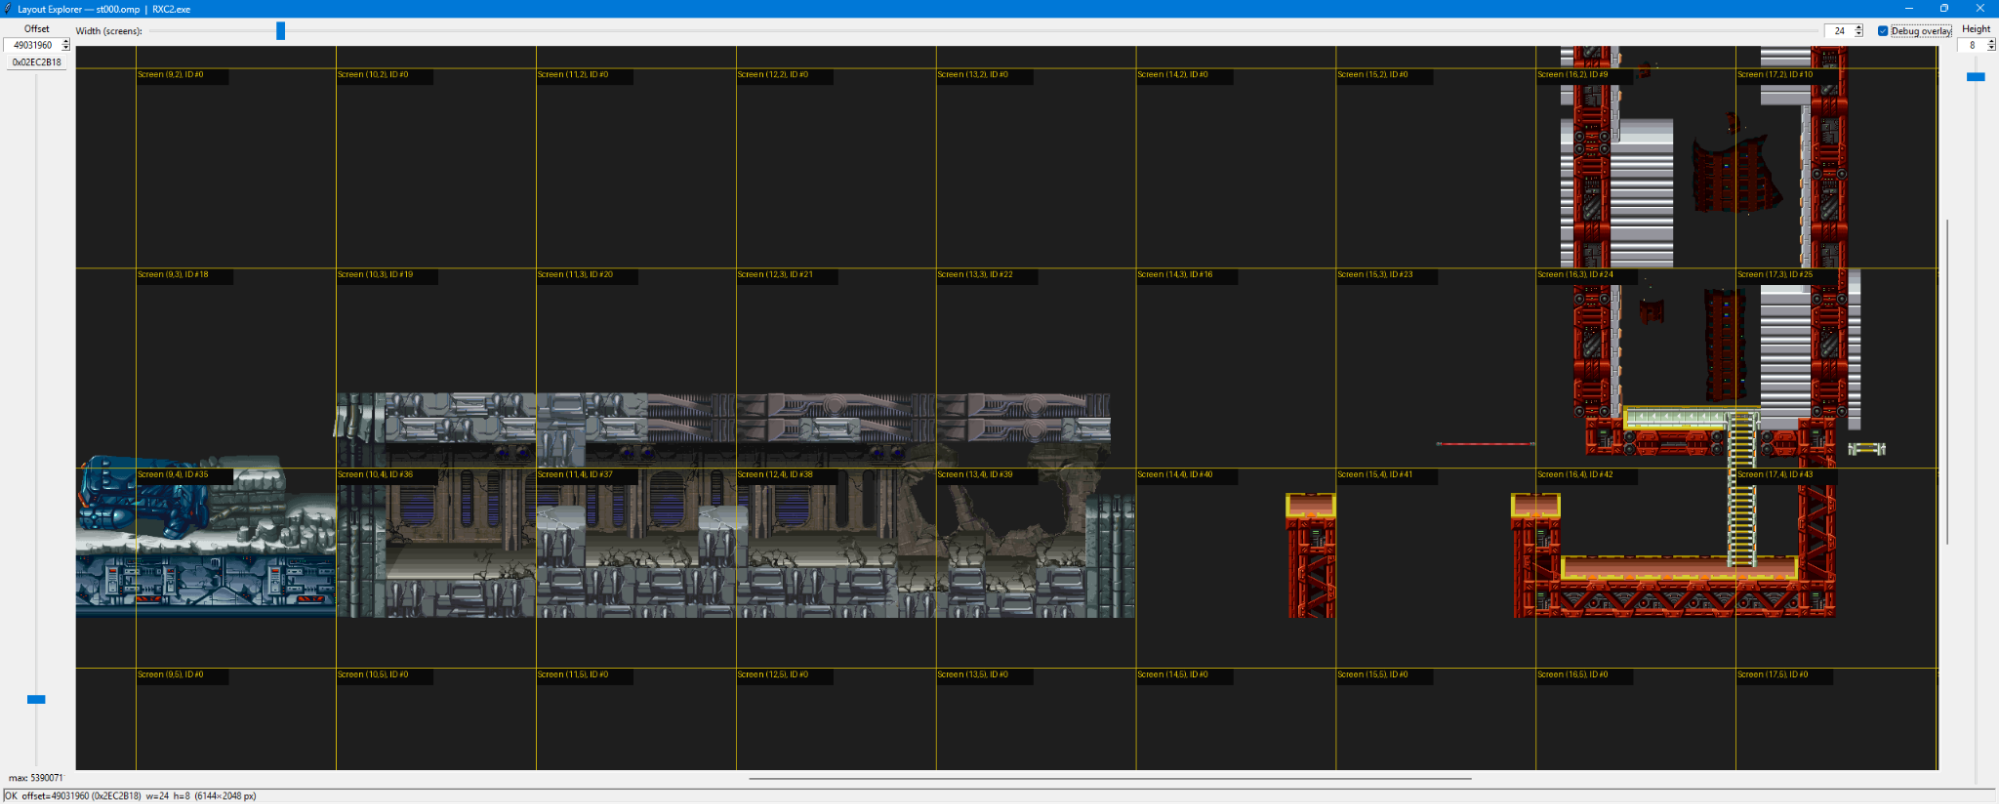
Wrong (left) vs correct (right) layouts easily verifiable.
 |  |
Funnily enough, while testing this tool I accidentally stumbled across the correct offset for X5 Crescent Grizzly (st010). For some reason it was really therapeutic to scroll through random junk data until you found the right patterns, so I used this method to find several other stages too.
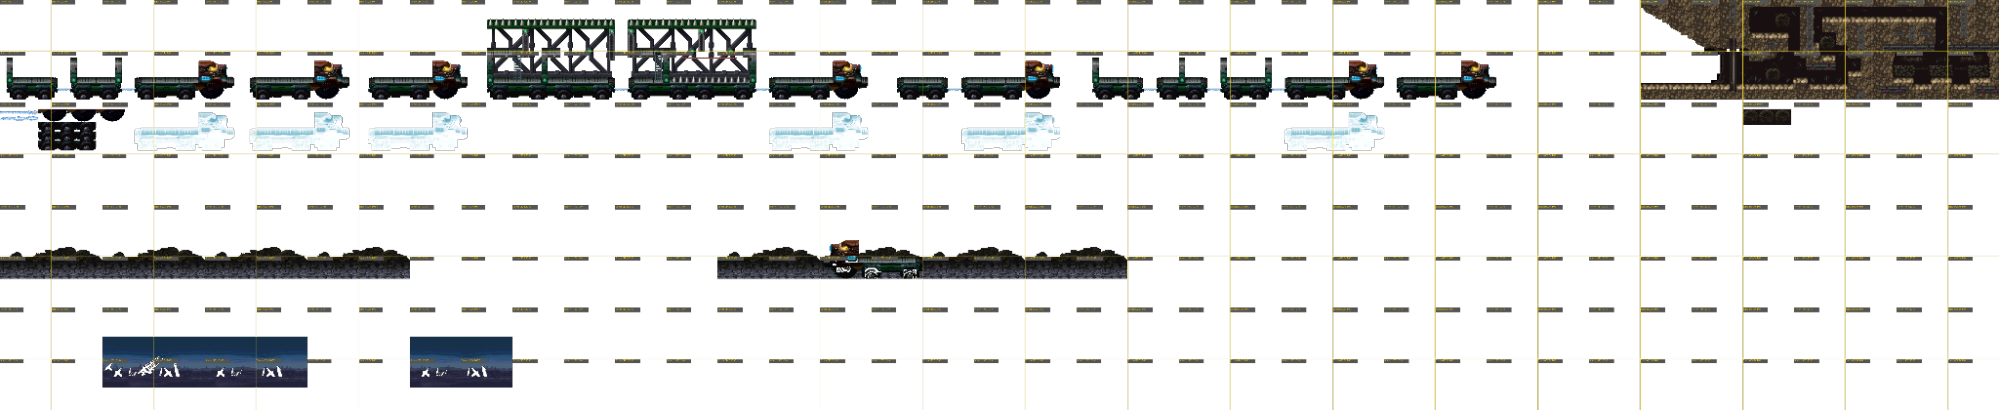 |
Since most of the stage offsets are known now, explore_omp.py also reads them for a seamless experience. If you’re a completionist type and want to help figure out offsets for the remaining non-stage OMP files, this can be a helpful tool to verify your findings.
Pass in args for which game you’re targeting, which executable or even which layout file (if examining layout bin files ripped from PSX X4).
The debug overlay let me note down the screen IDs whenever I spotted a few recognisable chunks. Used a hex editor to scan the EXE for the hex equivalent sequence of screen IDs to find an approximate offset. Paste found offsets back into layout explorer to quickly verify findings. The important part is they have to be horizontally sequential. Vertical doesn’t work because the values are stored as a 1D array.
(Probably could have done this more easily by looking more closely at the OMP catalogue and grabbing the screen ID from the index. Oh well, hindsight is 20/20)
 |
Got curious and used AI to generate a script to extract all PSX X4 layouts based on code from TehemanX4, but that method only worked for X4 because the game had a dedicated section which contained all offset addresses for easy picking. Saved some time, but X5 and X6 still needed to be done manually.
This is where vgmaps.com really saved me time as I didn’t have to play the games and take my own screenshots! Quickly looking at layout explorer for recognisable screens, stitching together the screen ID values in the right order and searching for hex value worked.
But doing this is really tedious, but almost 50 times (25 for X5, 23 for X6) is a waste of time. Again, AI is great for this kind of mundane number crunching so in comes match_layout_to_map.py, a script which searches for an offset given a vgmaps stage image and the stage name you’re trying to match. Not gonna lie, I don’t understand the fancy algorithms it used (HOUGH and FFT) but it worked way better than expected, one-shotting all the remaining stages.
With the final puzzle piece in place and the offsets all plugged in, render_stage.py can finally live up to its name by pulling together everything learned from TEX/COL > OMP/OCL > Layout to generate a stage PNG!
RMX Challenge 7; Three games, one renderer
14-21st Jun
With the rendering pipeline working pretty well for X4 and X5, I genuinely thought I would be done once I added some X6 mappings to game-files.csv. Hoo boy was I wrong…
 |
The moment I plugged in X6’s intro stage for rendering, I started questioning my memory of what it was supposed to look like. I know the Eurasia crash hit pretty hard, but surely not this badly?
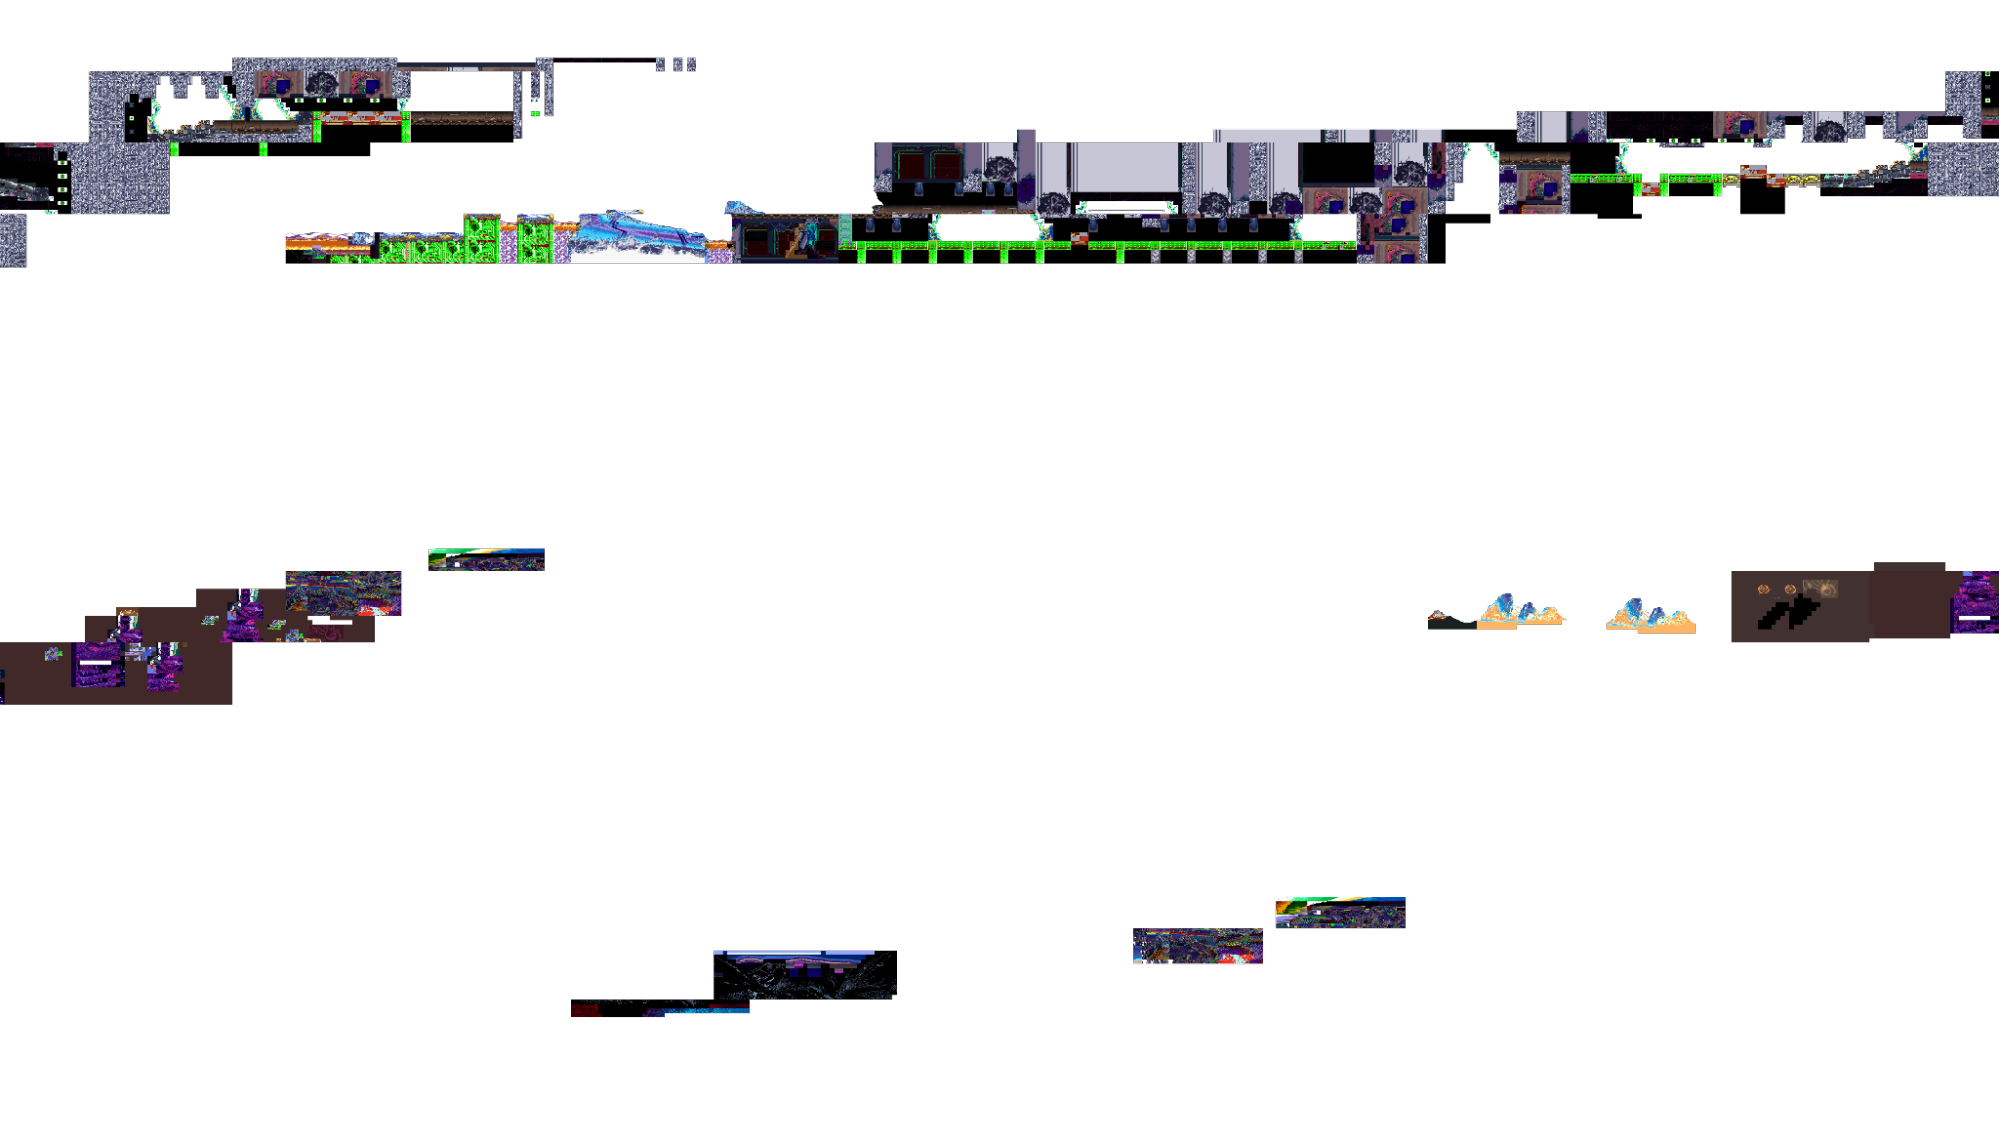 |
Despite looking very similar to X4 and X5 in-game, it seems like a few things changed under the hood for X6. First up the palette mapping logic was different. Second was a whole heap of garbled tiles, and there also seemed to be a lot of missing data from output.
So I pulled out the trusty clut_finder.py tool to do some old fashioned tile/palette mapping. Turns out the stage tile colour offset for X6 is 96, instead of 64 like the other two games. That adjustment made rendering more tolerable. But there were still a bunch of tiles rendered incorrectly.
 |
Anyways it’s been 3 weeks and I’m tired boss… so this time I let AI try to figure it out by itself. Gave it the ideal image, told it to fix the rendering process by finding patterns and explaining why rendering is broken for X6. But it just burned a tonne of tokens without returning anything useful. Prompt roulette, guess you win some, you lose some eh? I figured the trick with prompting is you gotta be more specific and target sections with similar issues with relevant data sets to untangle the ball.
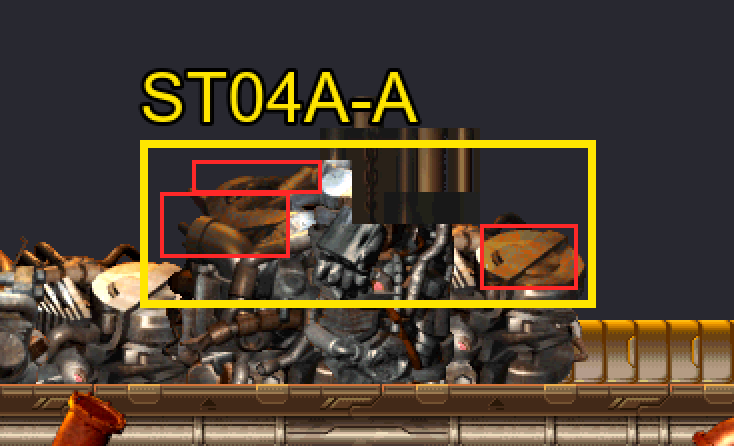
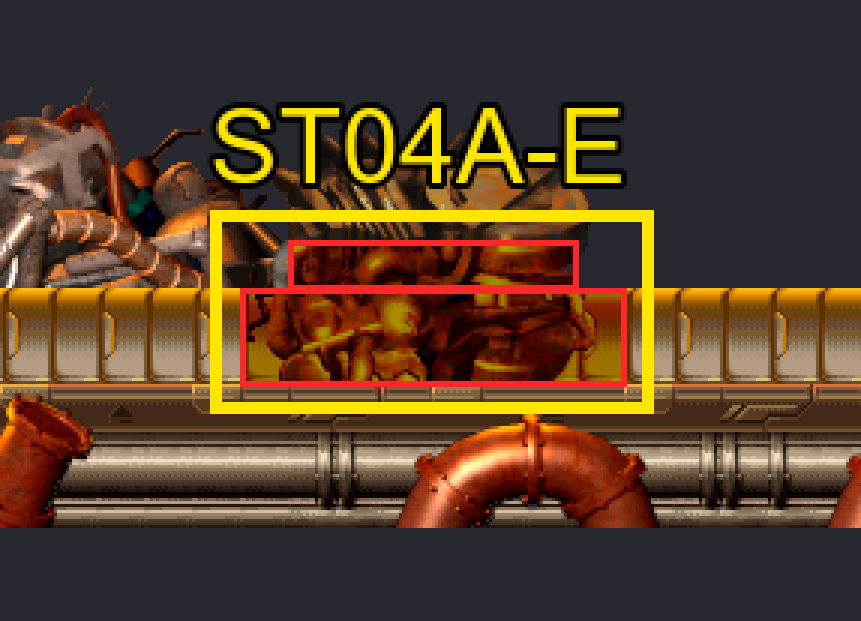
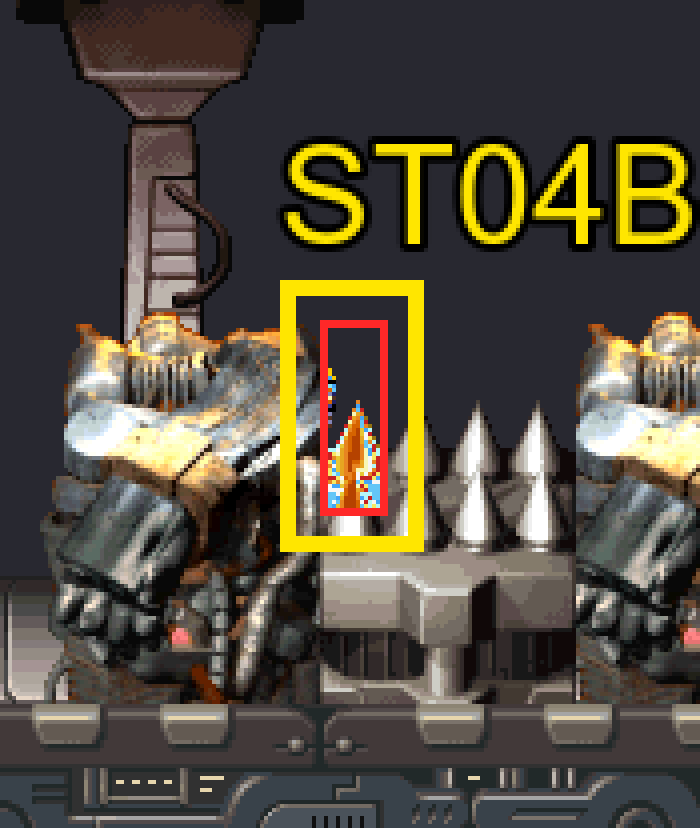
Eventually it discovered that the remaining palette issues were due to X6 using additional data bits in the OCL which weren’t used in X4/X5, directing the renderer to use a secondary palette.
 |
 |
 |
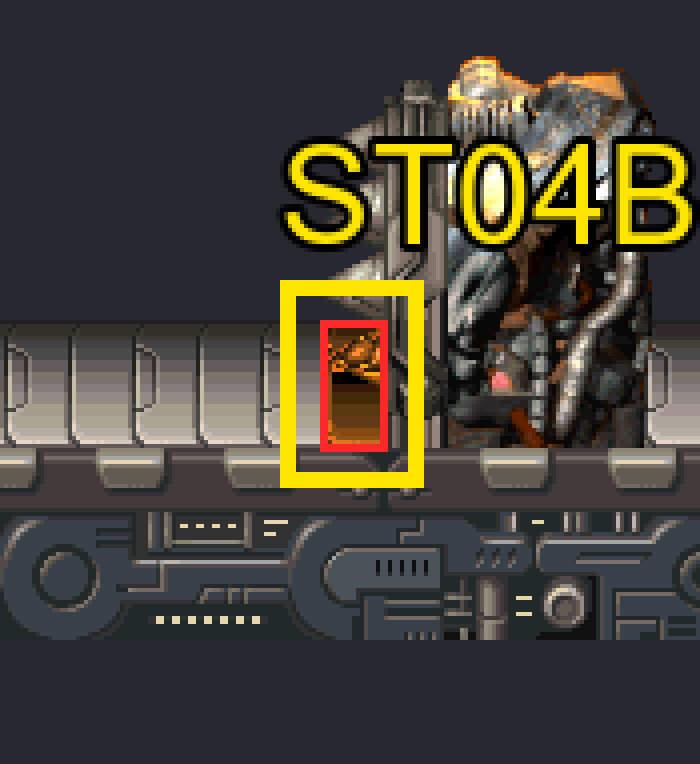
Another garbled tiles issue on Metal Shark’s stage which took longer to discover and figure out was due to different texture routing based on OCL.tex_page. In X6, when tex_page >= 8 means use 8bpp (chr256).
 |
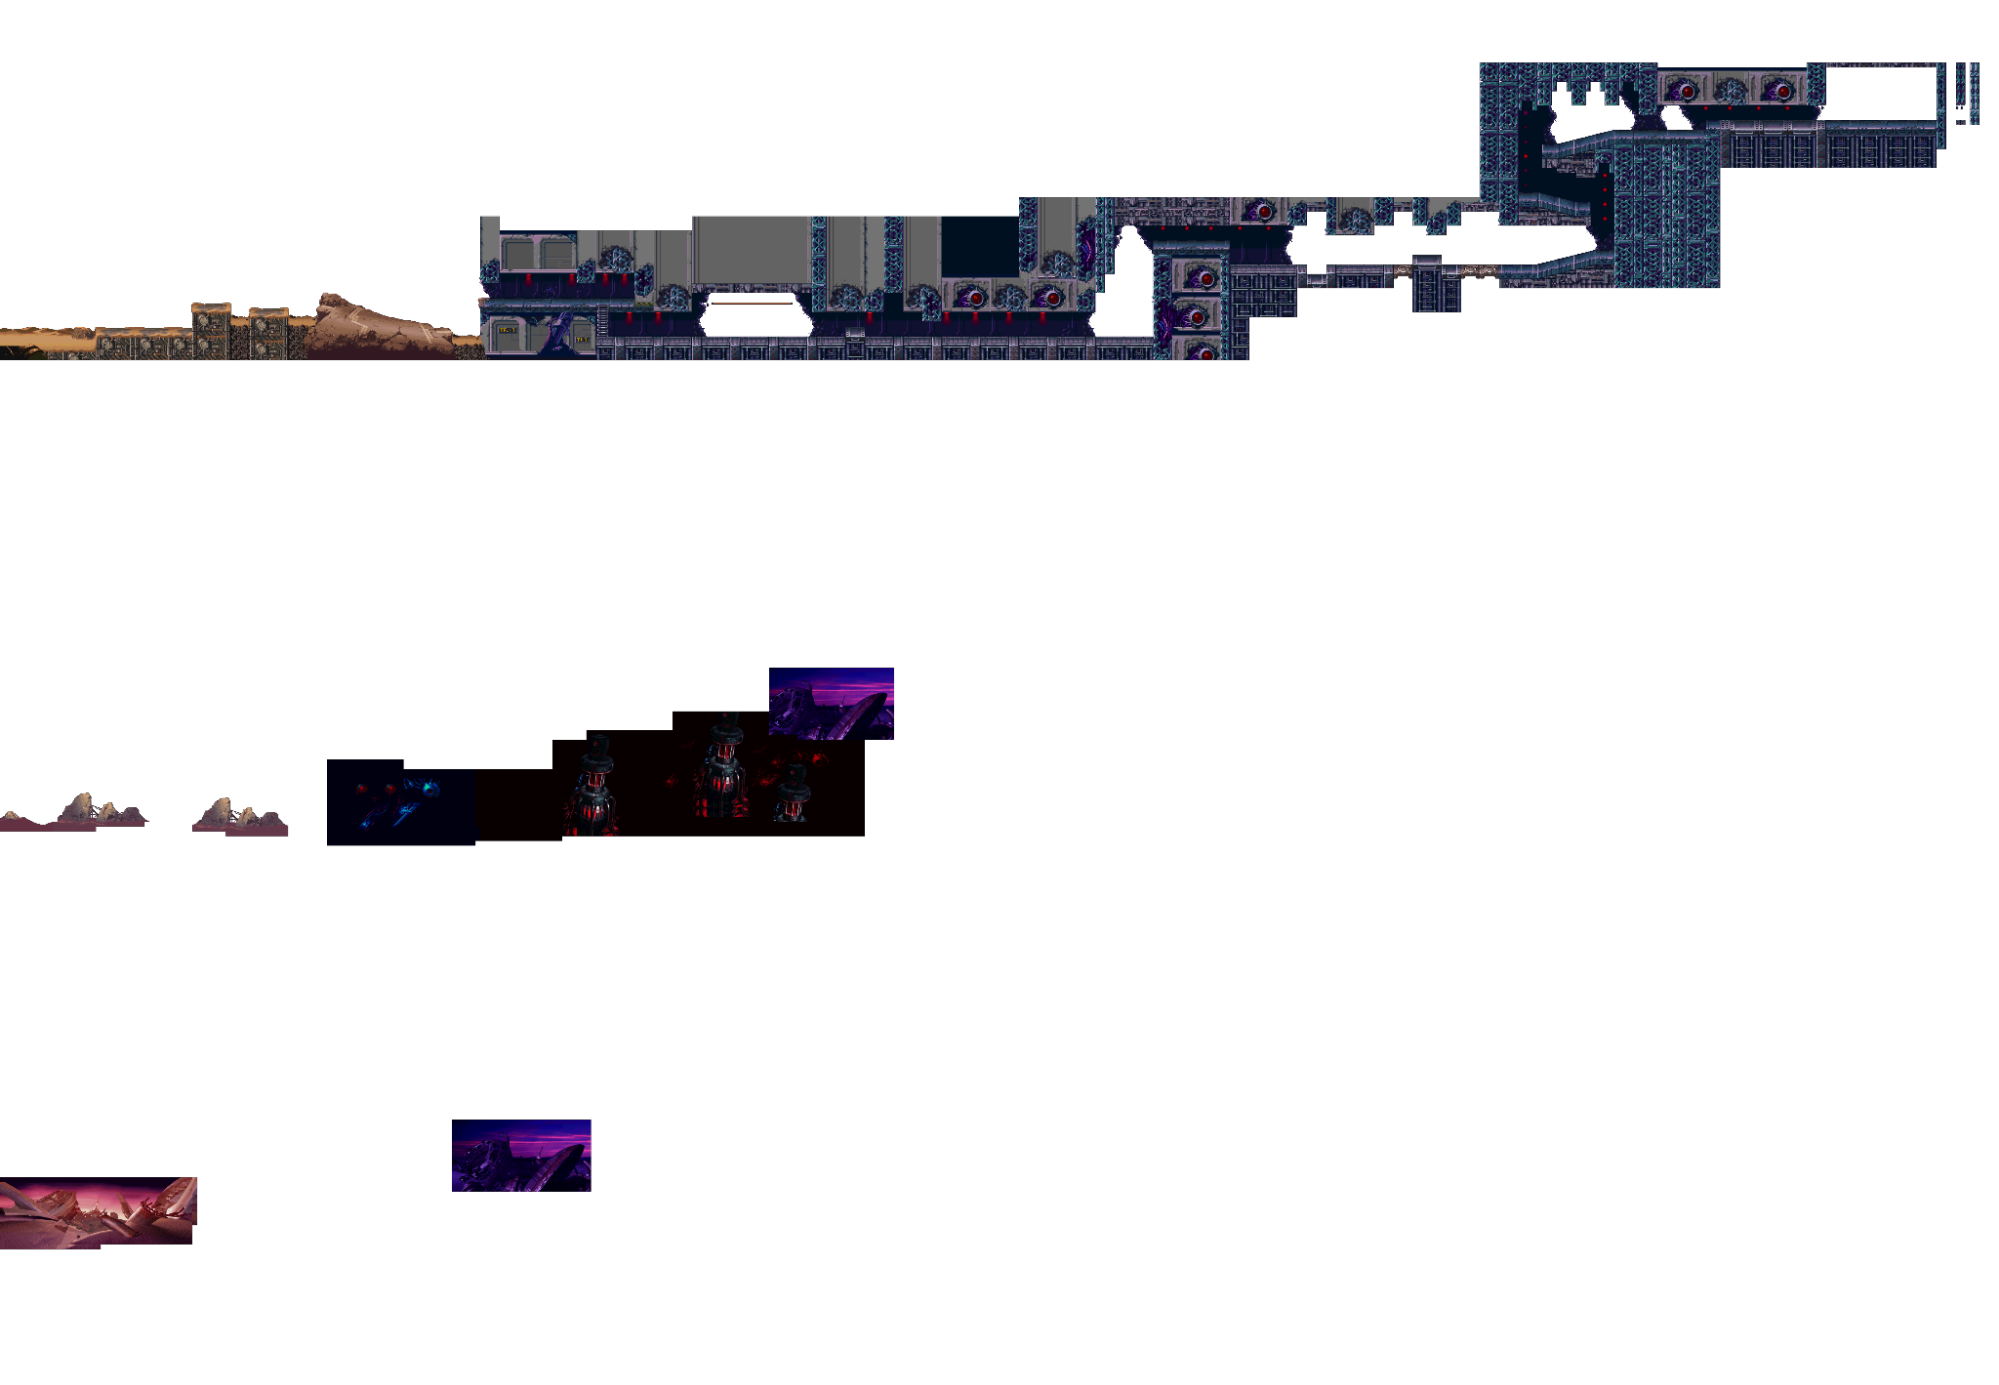
(X6 intro stage proper render after tilemap/palette fixes and finding the right layout)
 |
RMX Challenge 8; Transparency fights back
22-26th Jun
(Now we’re back to a more stable timeline)
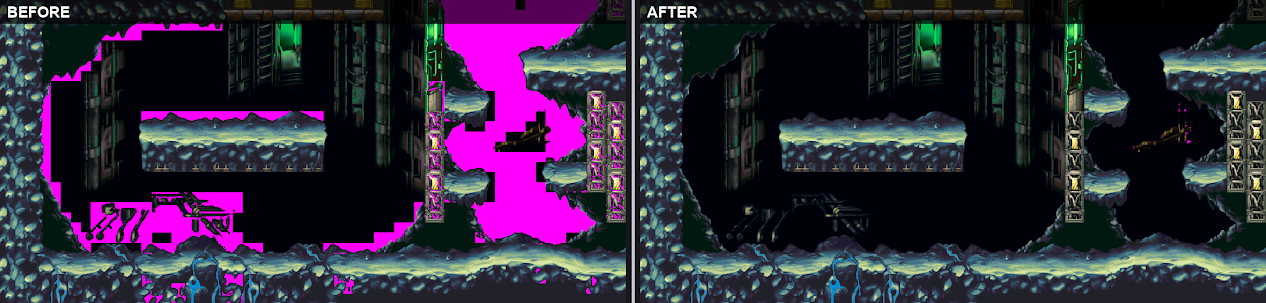
Investigated an issue where lots of tiles had inconsistent transparency (black boxes showing through unexpectedly or transparent when it shouldn’t be). This made for strange artifacting across many stages. It was a widespread issue across X5 and X6 which made the rendering pipeline seem buggy at a glance.
The root cause came down to an incorrect assumption I made at the start of the project, ignoring tiles which had RGB of 0,0,0 for black to emulate transparency. Once I got AI to analyse a few dozen tiles which exhibited these black boxes, it discovered there was an unused bit 0x4000 in OMP tiles data which could be used to determine use of PSX semi-transparency (STP). So the renderer was updated to halve the alpha values accordingly when this bit was detected.
 |
Surprisingly this led to fixes across all 3 games! Knowing when to actually apply transparency fixed the black box issue plaguing output files. Another side-effect was that most stages had some form of transparency used even if it wasn’t clearly visible at a glance.
- Tiles for X4’s Jet Stingray water and Storm Owl’s windows which I never thought were transparent.
- Same with green glass consoles on X5 Spiral Pegasus stage looked much better with some transparency.
- X6 Blaze Heatnix stage was littered with fixes.
Things are starting to look pretty good now!
 |
RMX Challenge 9; Animated waterfalls
28th Jun - 6th July
After the transparency fix there was only one glaring rendering bug remaining; animated water on X4’s Web Spider stage. Why were they green, pink and orange!?
 |
I knew it had something to do with palette swapping, an elegant technique to reduce artist workload and disc/memory storage.
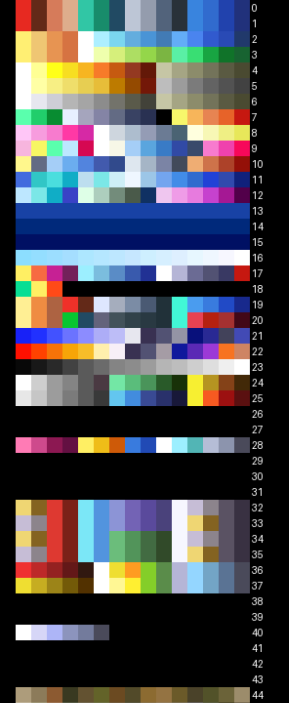
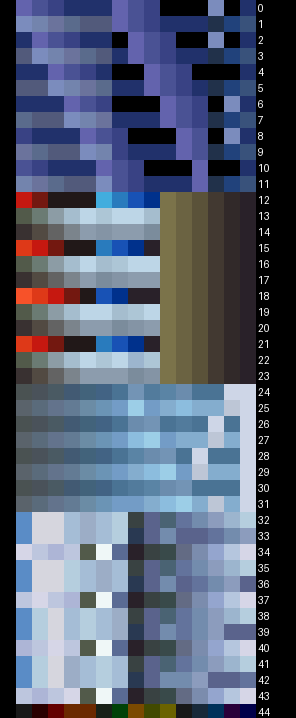
But how to marry the data up to the colours? For some reason the OCL data was mapping to an incorrect CLUT in the main palette. I could see the wrong colours in col01_0X_eng.col at the specified CLUT index, but the right colours for water are staring right at me in st1_0.col!
 |  |
I tried inspecting sprites loaded into VRAM via the emulator, taking snapshots every second to see what colours would show up. None of the colours matched the palette. I was stumped, so I dumped the VRAM and threw AI at it at full capacity. It was useless. Nothing sensible came out from it.
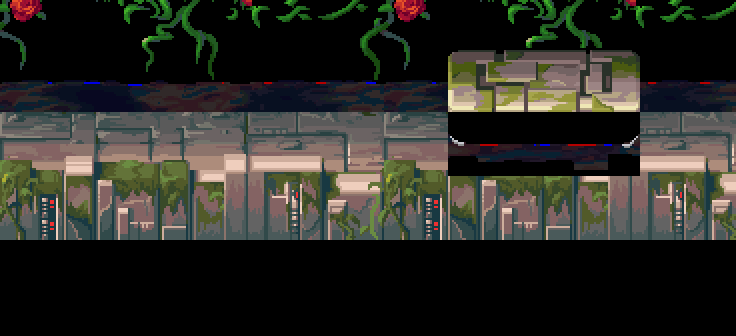 AI said this was all good. Don't let it cook unattended, it'll burn your house down. |
After some deliberation, I decided it shouldn’t really matter how it works for in-game as for this project we only really need one colour mapped as PNGs are static. So what I ended up doing was manually overriding the target row in col*.col with the desired palette from st*.col.
Limit the effect to a given stage and call it a day. This method was used to fix X4’s Web Spider (Area 1 and 2), X5 Spike Rosered’s puddles and X6 intro stage background. Things looked “good enough”.
 |
 |
What I suspect the game does is keep the one CLUT-index for those tiles but change the palette in-memory to simulate an animation without the need for extra sprites.
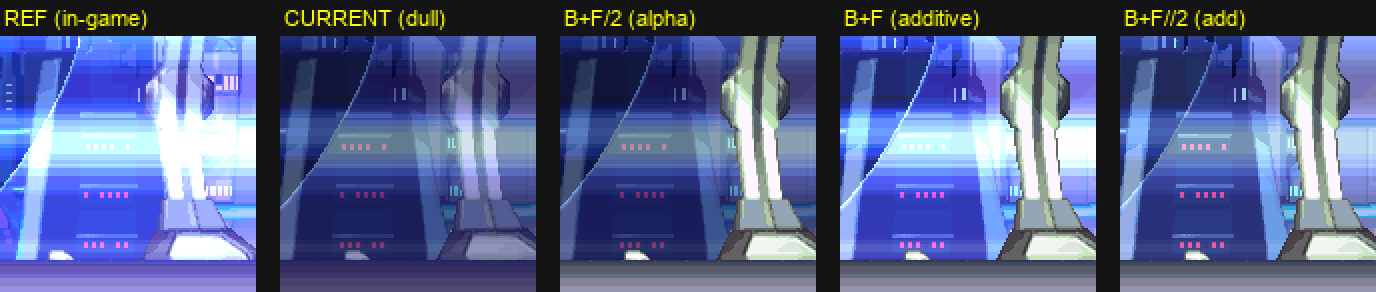
What I discovered later (after composing the 3 layers together, see next section) was the STP (PSX semi-transparency) effect had to be applied with an additive method rather than alpha transparency. This allowed the water to show up with a much more vibrant colour than with alpha transparency, also leading to a fix for the X4 intro stage glass tubes.
 |
RMX Challenge 10; Grand finale, Layer sandwich
7th July
Throughout the whole process, I kept the layout output PNG as a single image with 3 separate layers. This made it easy to diff for changes and detect improvements/regressions as tweaks were made.
But now the time has come to stack them together to see what happens. Surprisingly, most of it went pretty well! Most X4 and X5 stages squashed down as a neat stack, but X6 stages seemed to do stash more in the background layer so it didn’t compose as neatly without post-processing.
And with that done, I started cleaning up the code and writing this release post.
 |
RMX Challenge 11; Encore! Patching out in-game parallax
7-18th July
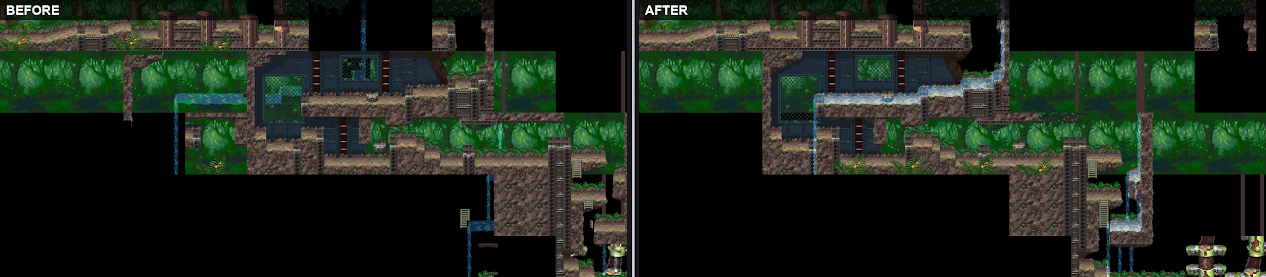
While looking for example images to show in the blog post, I noticed that the X4 Web Spider (Area 2) stage had a rendering issue. The layers just didn’t quite align as well as they should.
Something was off and I spent a lot of time manually scanning for an alternative offset or checking the source of TehemanX4 Editor to verify if the PSX offset was correct. But the more I verified, the more I was certain this was the correct layout table offset. Nothing else even came remotely close to this when output is composed.
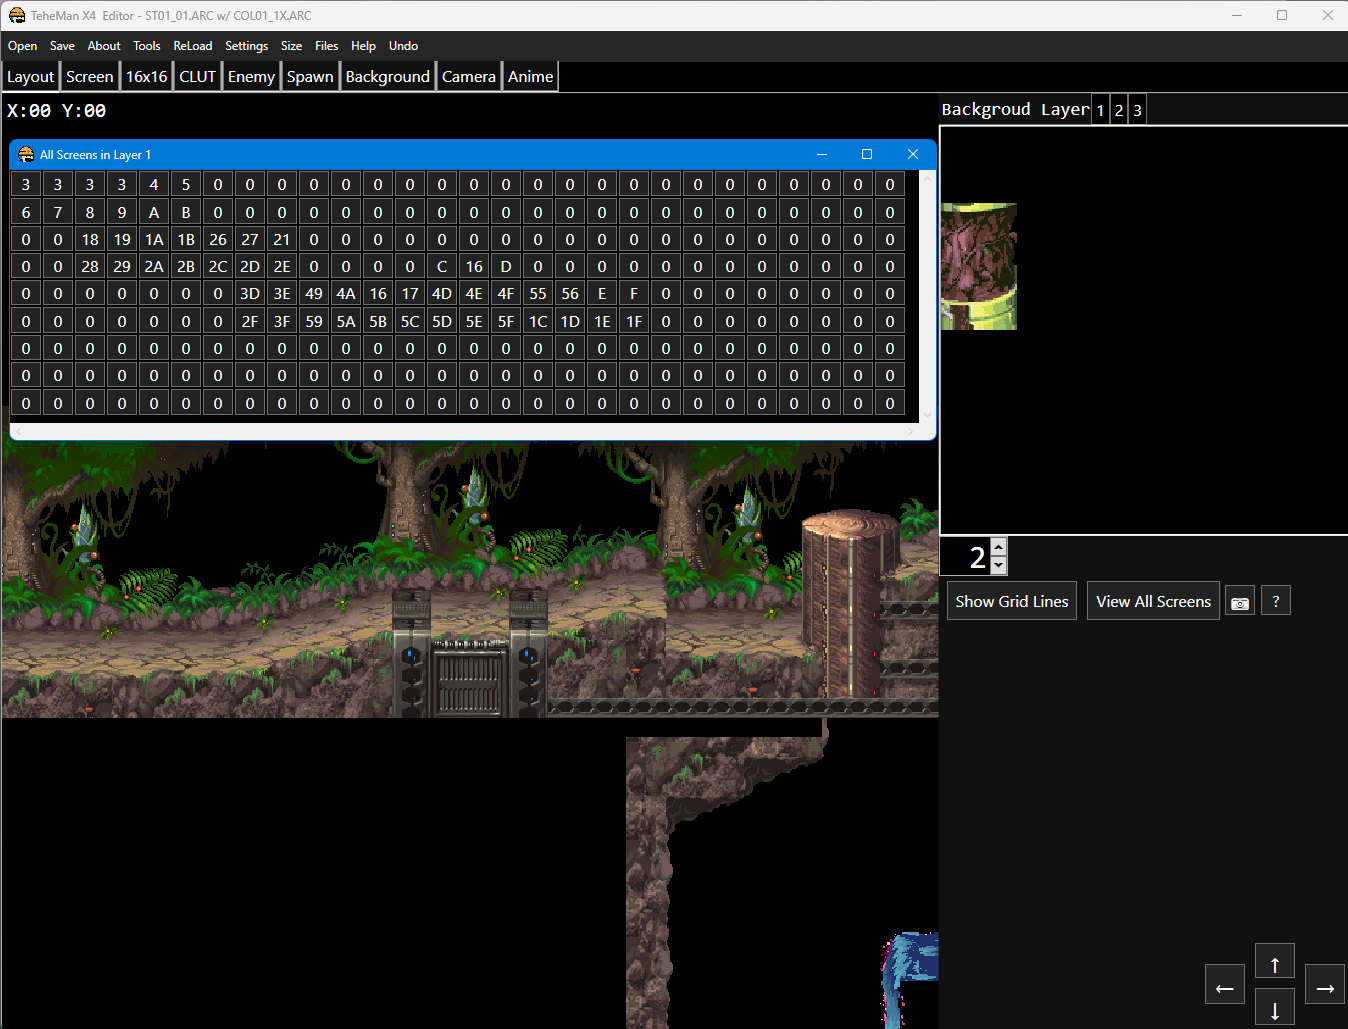 Even the PSX stage layout matched this information as shown in TehemanX4 Editor Even the PSX stage layout matched this information as shown in TehemanX4 Editor |
So what’s wrong with it? I watched a gameplay clip of this area again and realised immediately what the issue was. The intro section applied foreground parallaxing, so the layer 0 and layer 1 positions needed to be adjusted accordingly for a smooth effect.
But X4 devs achieved that by introducing gaps in the layout table. Did the game code around this somehow? Or was there additional metadata in the files which instructed the game how to process this gap? I dunno, but this did my head in!
Again, given some more thought I came to the same conclusion as before; it doesn’t really matter because this is a static render. So I simply patched the layout table specifically for this area on read, commented on it then called it a day.
 |
Wrapping it all up (28th Jun - 16th Aug)
While cleaning up the project, I spent some time refactoring the code a bit to give const names to magic numbers scattered across the codebase, removing process baseline images (they were taking up too much space on git) and wrote up extract_from_game.py, a one-shot script to simplify the set up of necessary game assets.
Run extract_from_game.py, provide the MMX LC 1 and 2 executable files and it’ll do the rest. Note it defaults to the English assets (haven’t tested with non-English at all).
I’ve still got a tonne of other junk assets I could write about, but gotta draw the line in the sand somewhere.
After posting this blog I’m going to find a way to nuke the progress-baseline assets to save +700MB from the repo. Way too big for a project of this size. Mainly the full render images I used to keep track of progress which I used to make these “timelapse” videos split out by game.
Also shoutout to Kuumba123, acediez and many others for sharing their learnings and making this all possible in the first place!
Hope you’ve enjoyed the highlights recap!
Git cleanup done.
- 347 commits down to 331
git filter-repo --invert-paths --path progress-baseline --path-glob debug_data\ST00*.png --path-glob debug_data\test-*.png --path-glob debug_data\test-st000-*.png.gitfolder now 50mb, down from 734mb